
Not using square payments yet? check out this link.
With the Post-Appointment Payments feature, staff can...
Send a bill to a patient so the clinic can receive payment promptly
Automatically release files after the fee has been paid
See what bills are paid and unpaid to ensure collection
Send a payment reminder
Filter unpaid invoices to block patients with outstanding balances from booking
The sections are as follows:
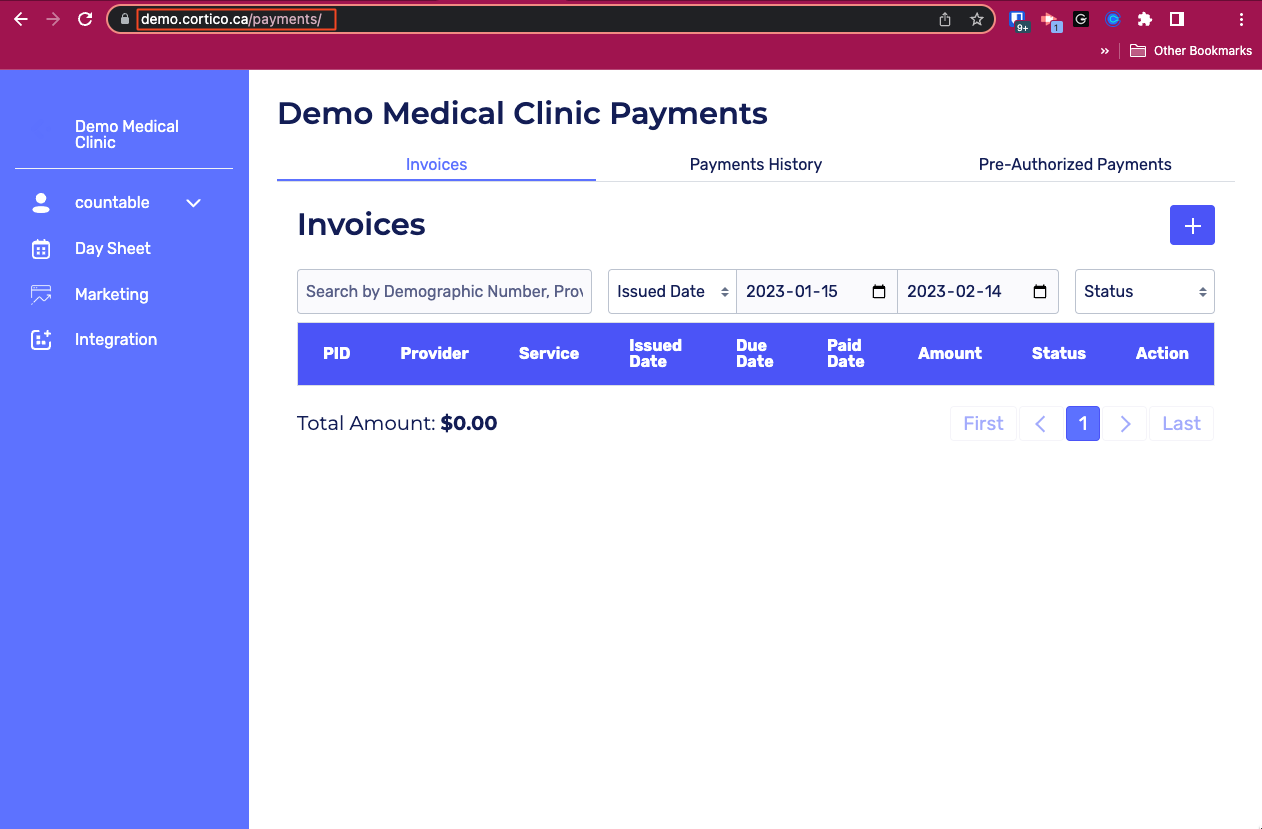
1.1: Accessing the Payments Page
There are two ways to access the Payments page.
Option 1 (Oscar):
Access the Plug-in from your EMR, which will also auto-fill the patient's info in the invoice.
Open the E-chart of the patient that you wish to send an invoice. Then click the Cortico logo on the bottom right to open the plug-in.
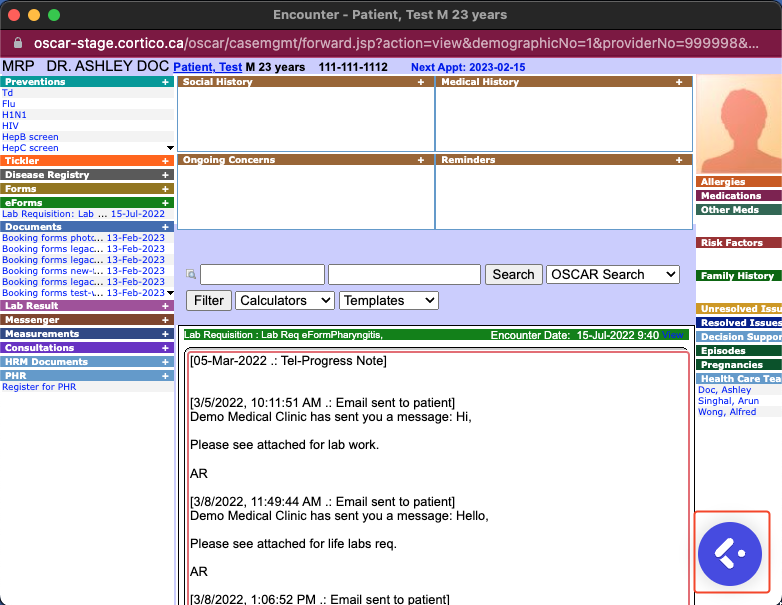
Now click the "Invoice" button to go directly to creating an invoice on Cortico.
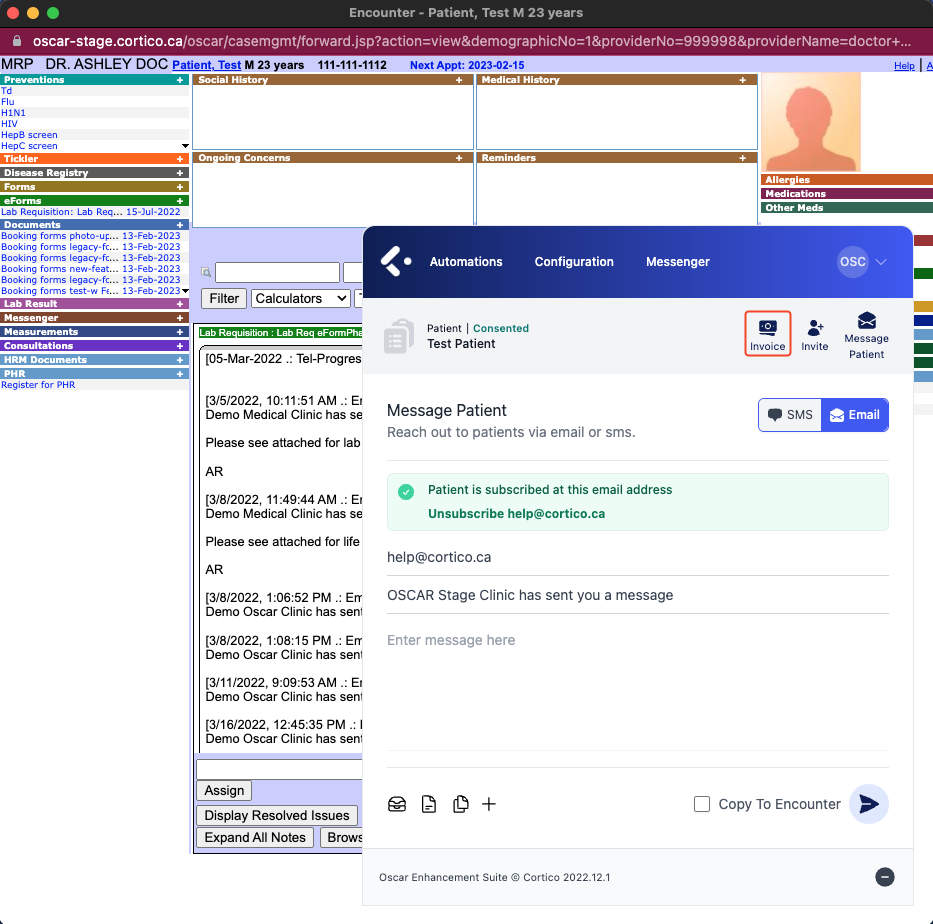
You can now fill out the invoice details, and notice the patient is already selected when accessed through the plug-in.
Option 2:
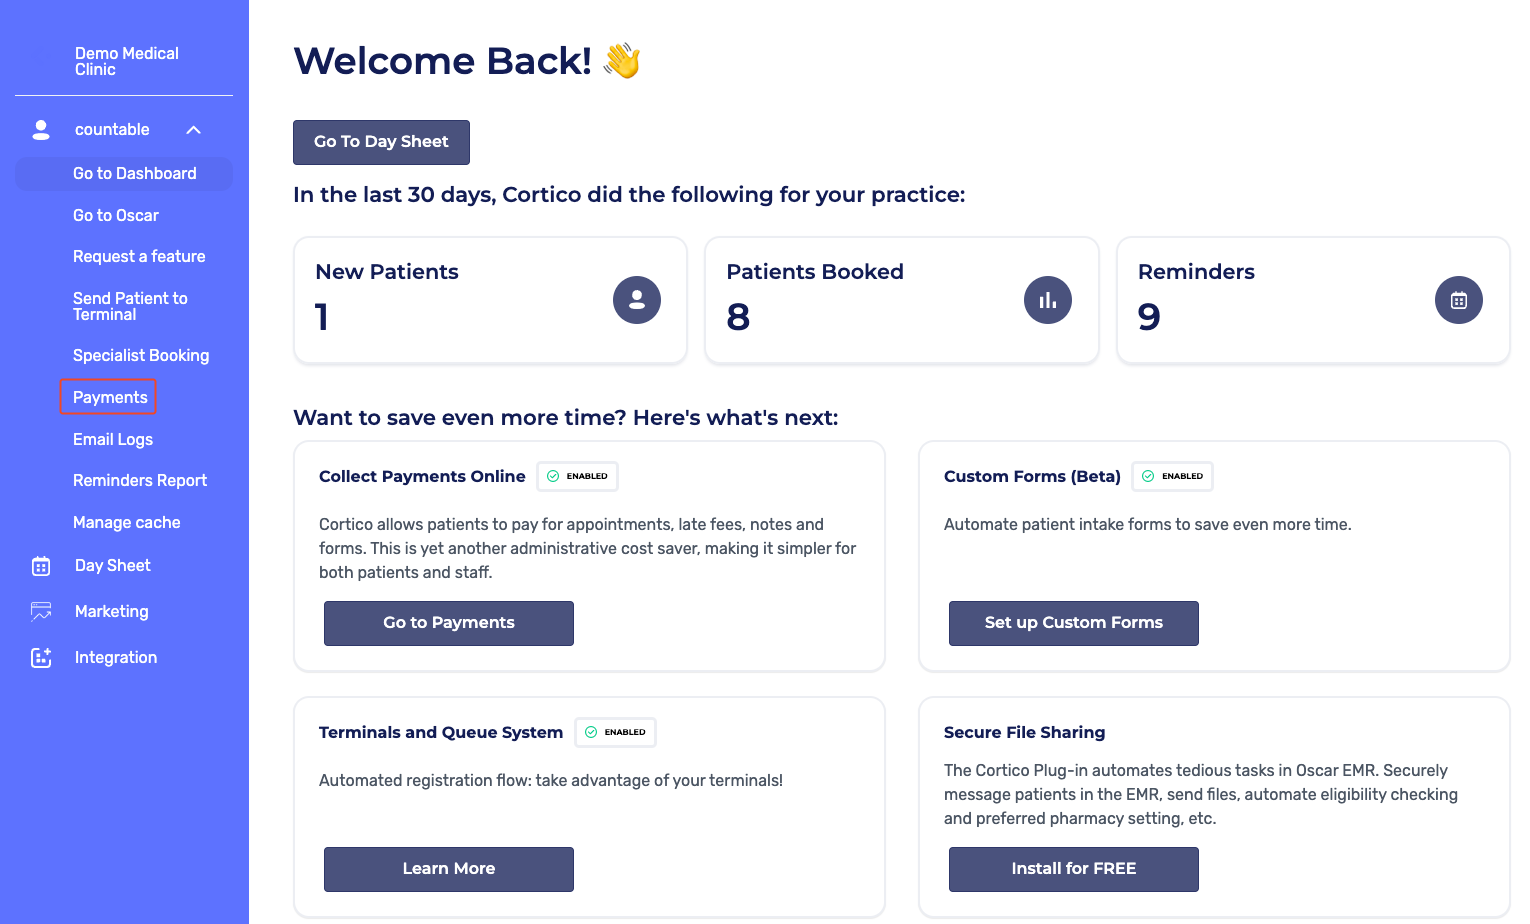
Access the payments page through the drop-down menu on the left sidebar of your Cortico Dashboard:
Alternatively, you can simply add /payments to the end of your Cortico URL. For example clinicname.cortico.ca/payments.
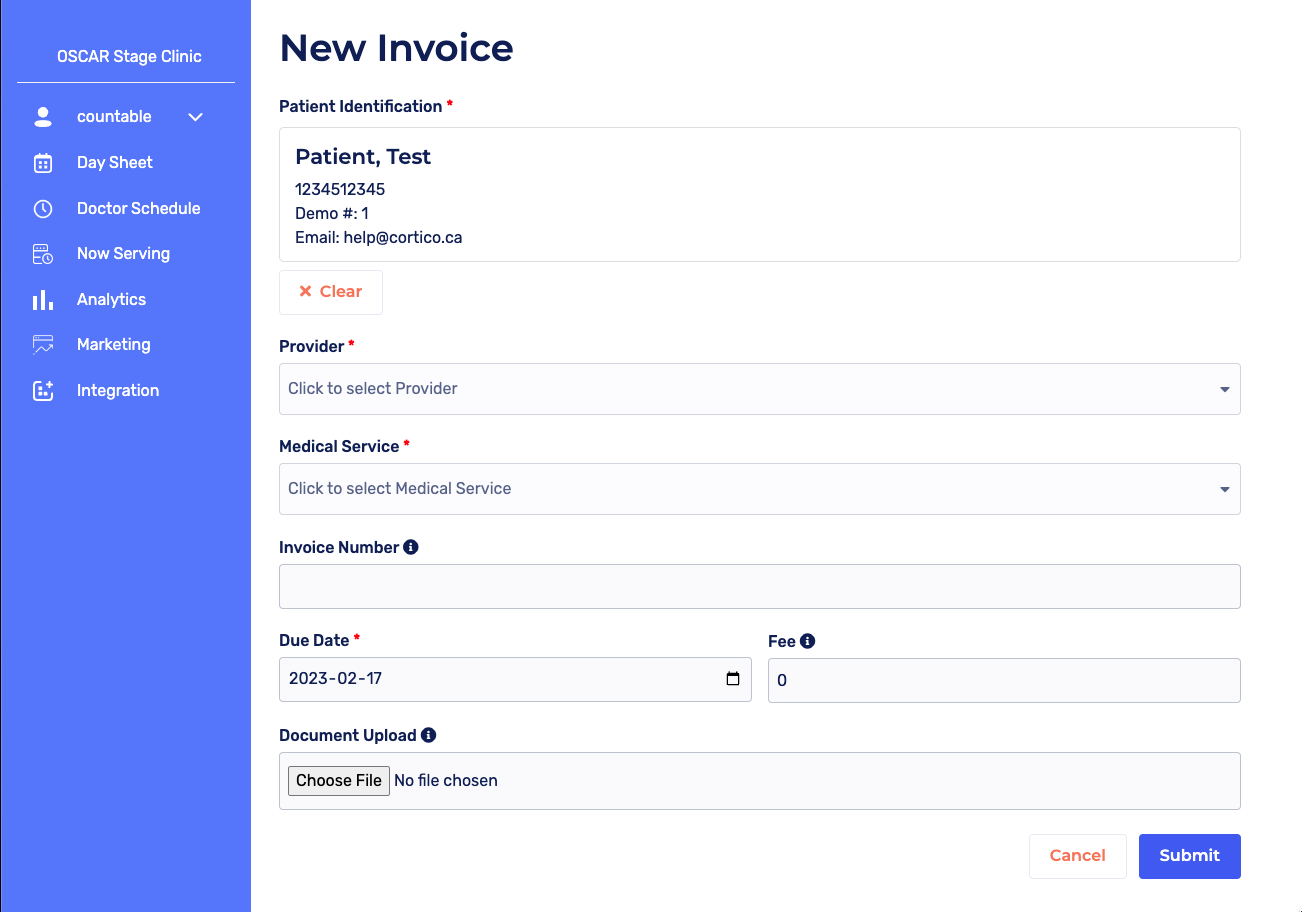
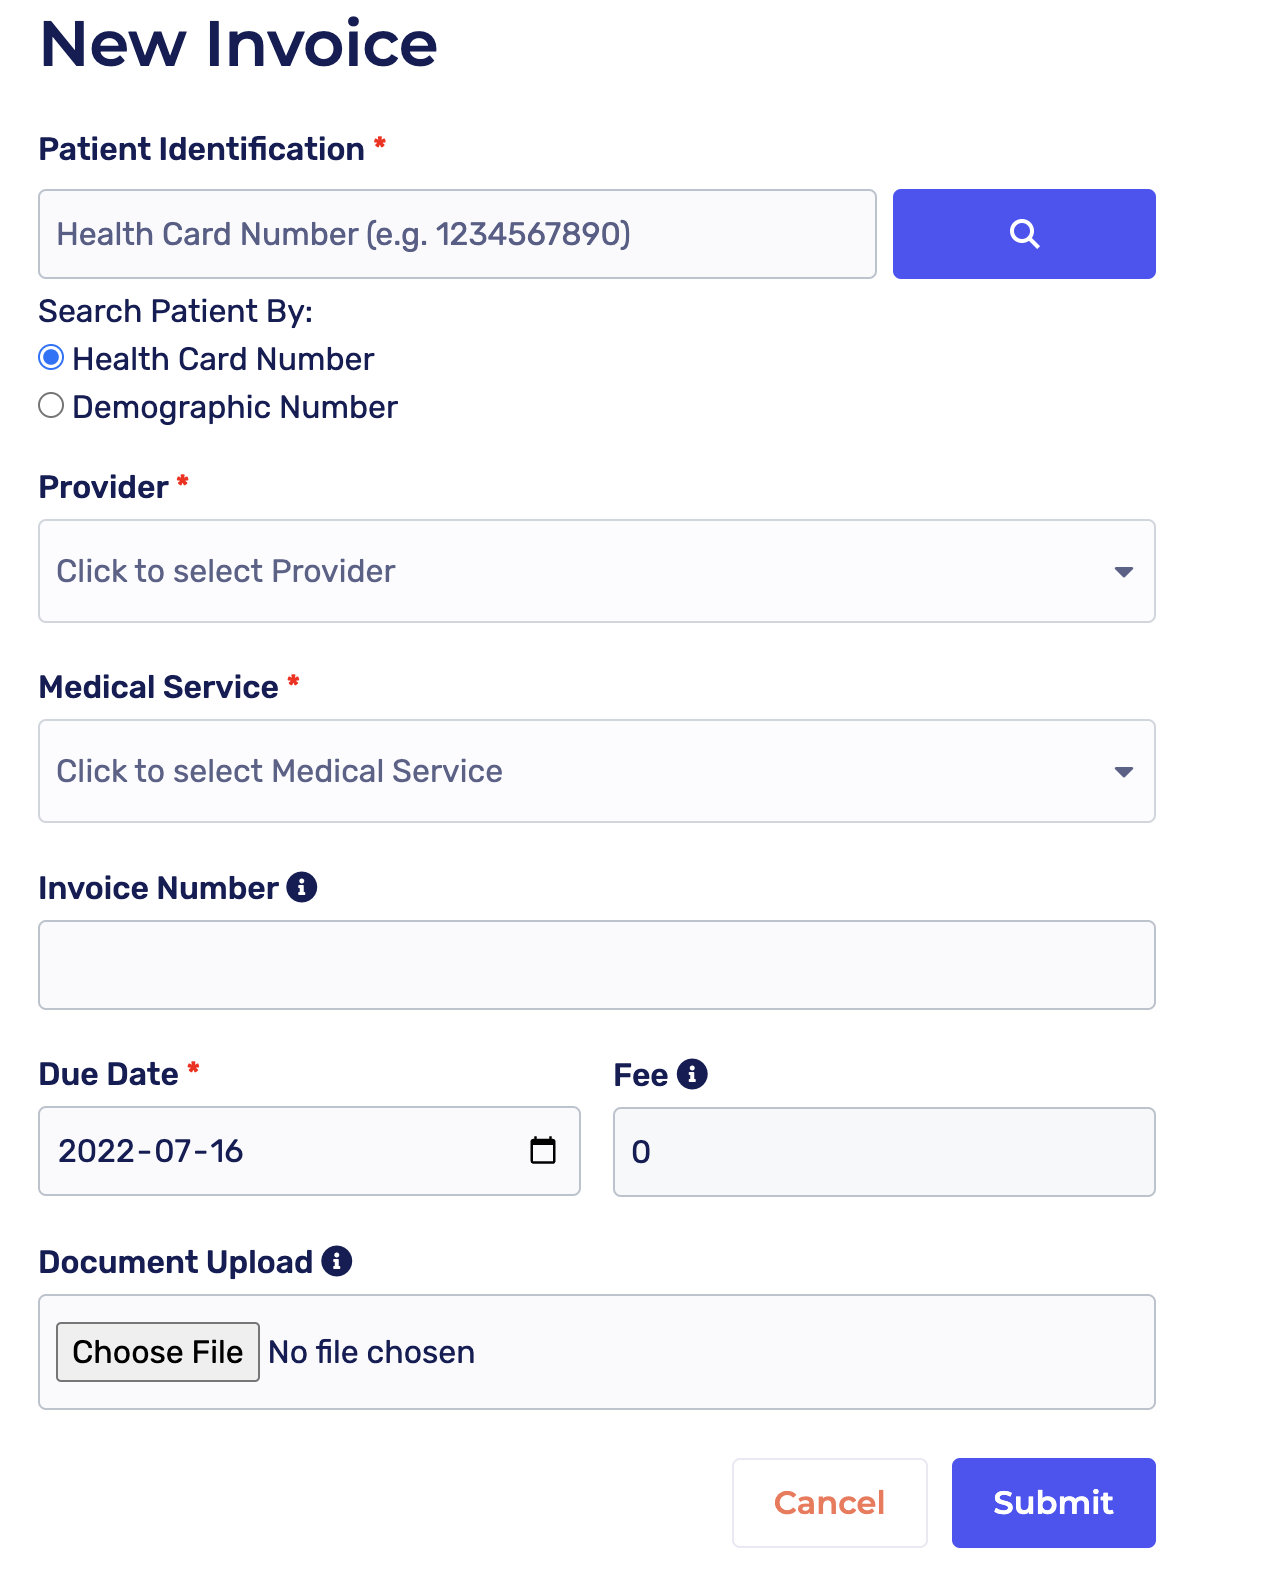
2.1: Creating an invoice

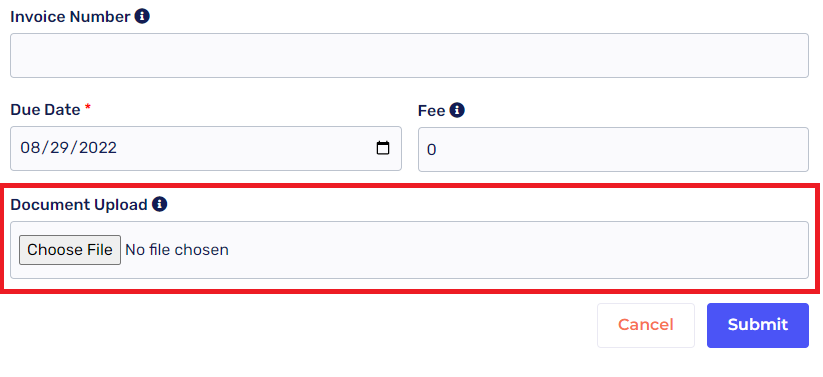
To create an invoice, click the + button on the top right-hand corner of the invoices page and fill out the following information:
2.2: The Invoices Page
Contains records of all invoices sent. You can also send a new invoice from this page.
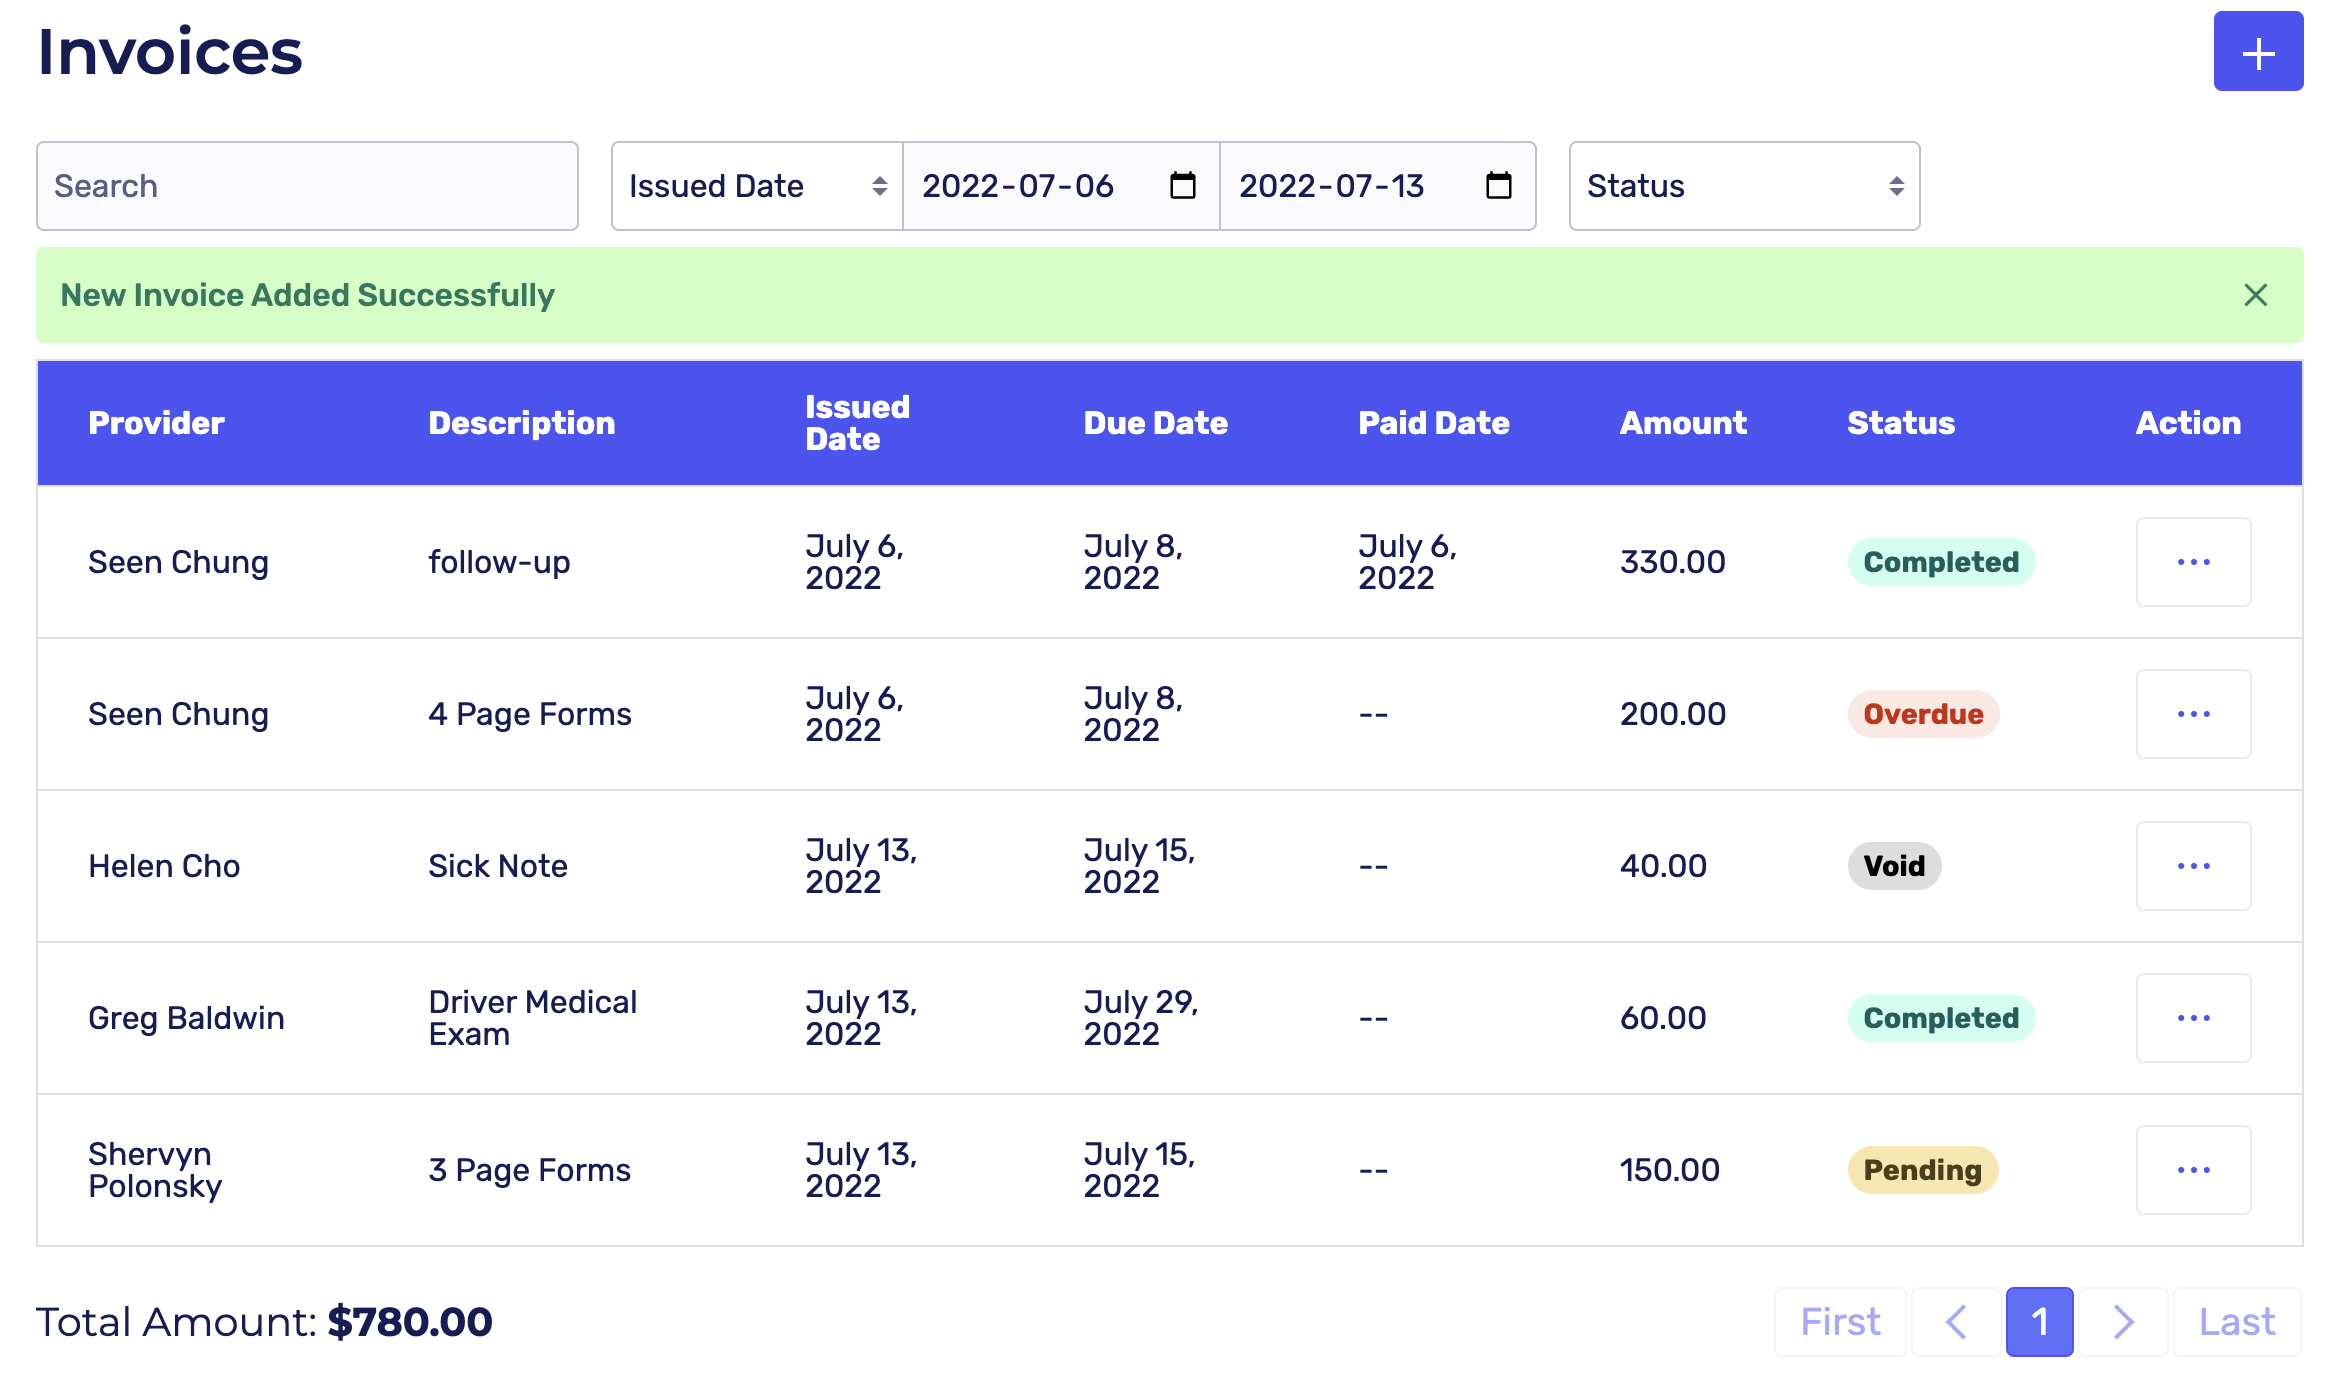
Features on this page include:
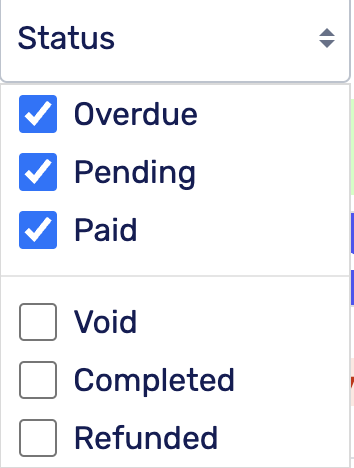
Search invoices (by date issued, status, or demographic #)
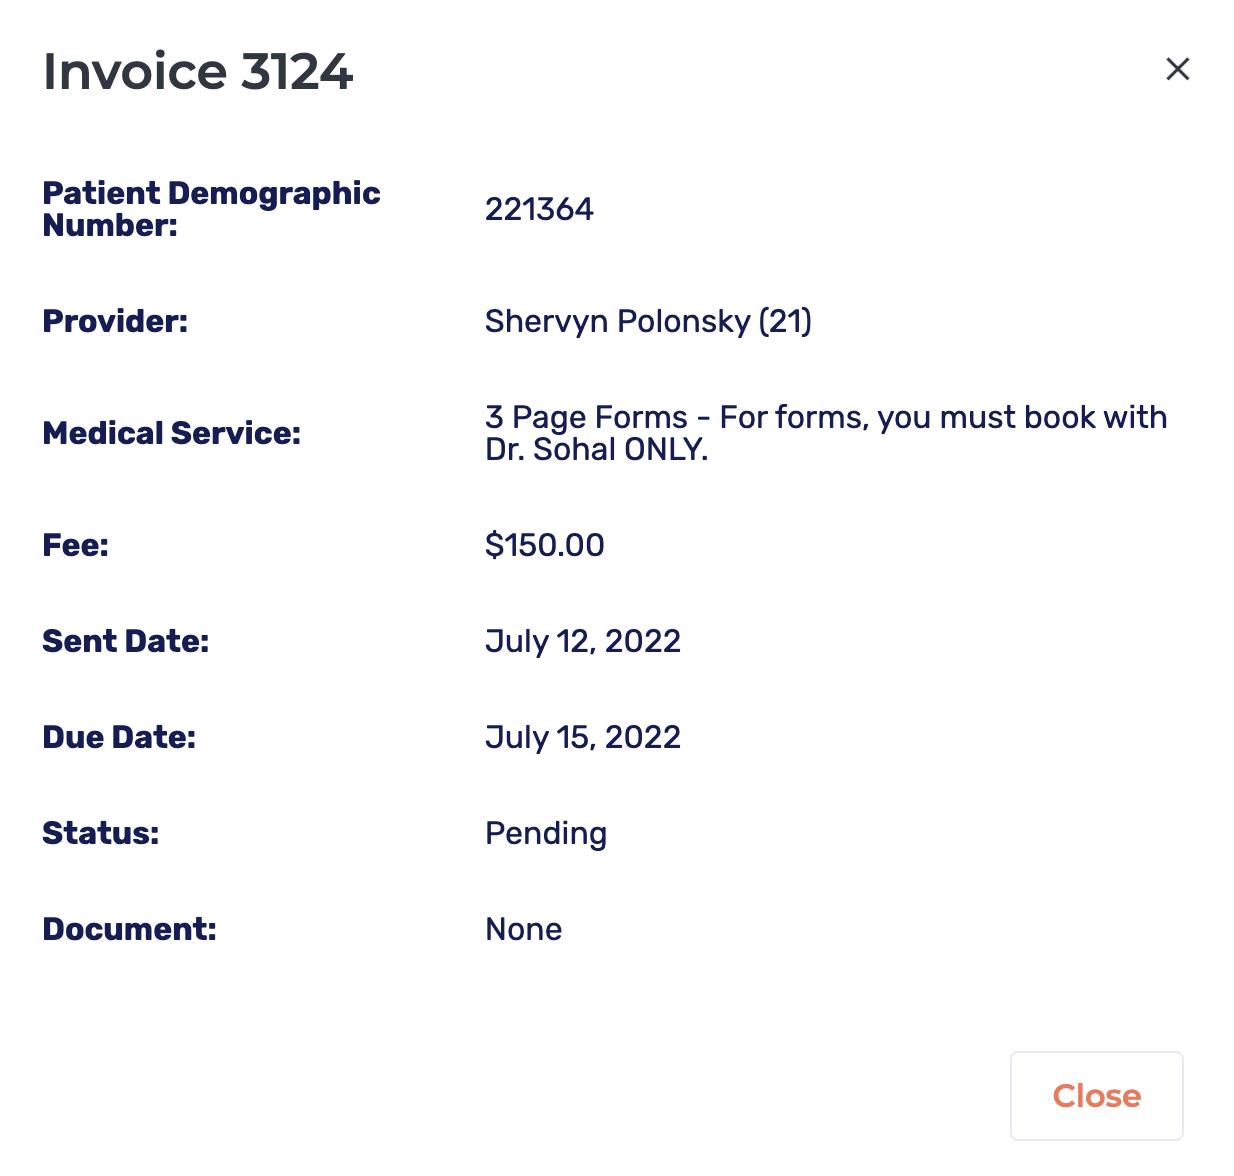
Invoice information such as provider, description, date issued, due date, paid date, $ amount, and status
Actions button: Complete, Void, Resend, view More Details
Default statuses shown are Overdue, Pending, and Paid.
Action Button
The 'Actions' outlined in the previous paragraph are accessible by clicking the white box with three blue buttons on the far right of an invoice (see picture below).
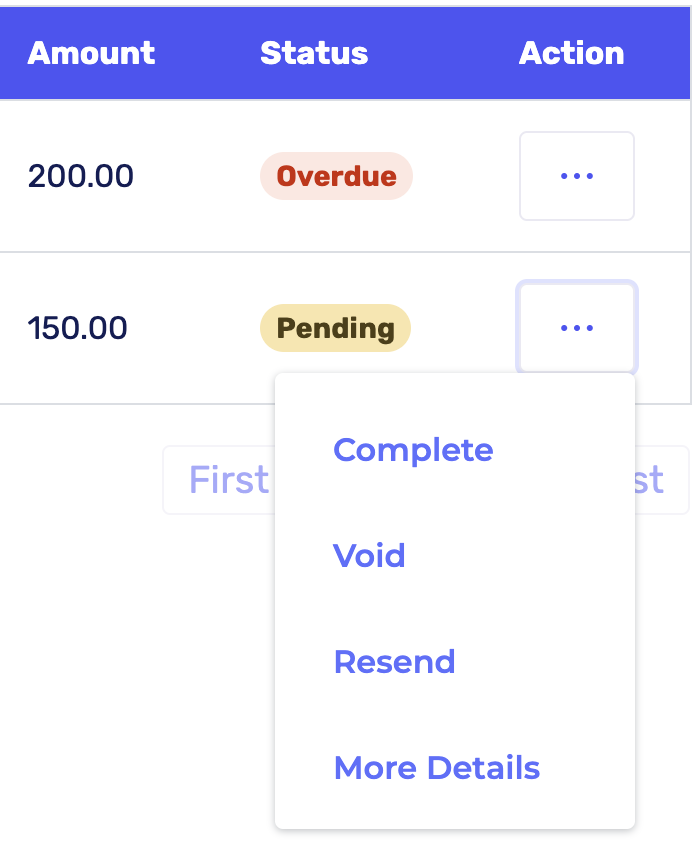
By selecting "More Details", a full report of the invoice is shown.
2.3: How to attach and release documents
You can attach a document to the invoices you create in Cortico.
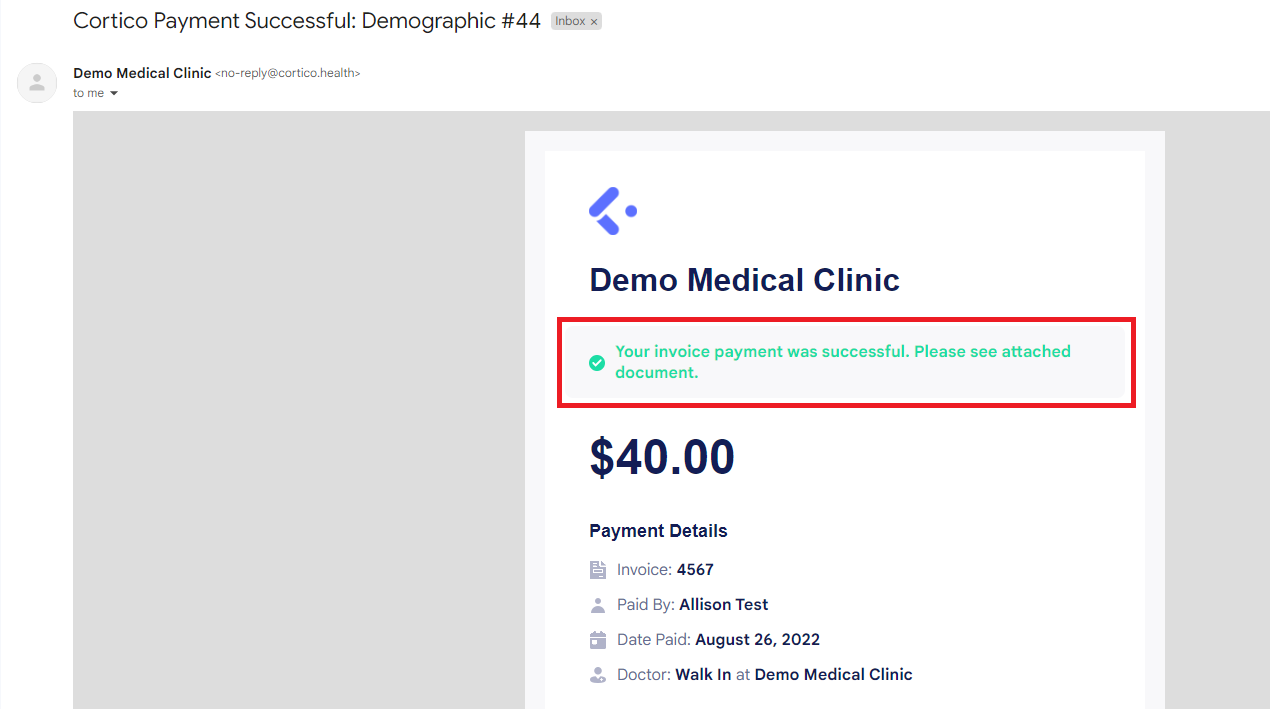
Once a patient pays their fee, they're sent an email that includes their document i.e. their sick note!
You can view what the process would be like in this screen recording below:
3.1: Patient view
When a patient is sent an invoice, they receive this email:
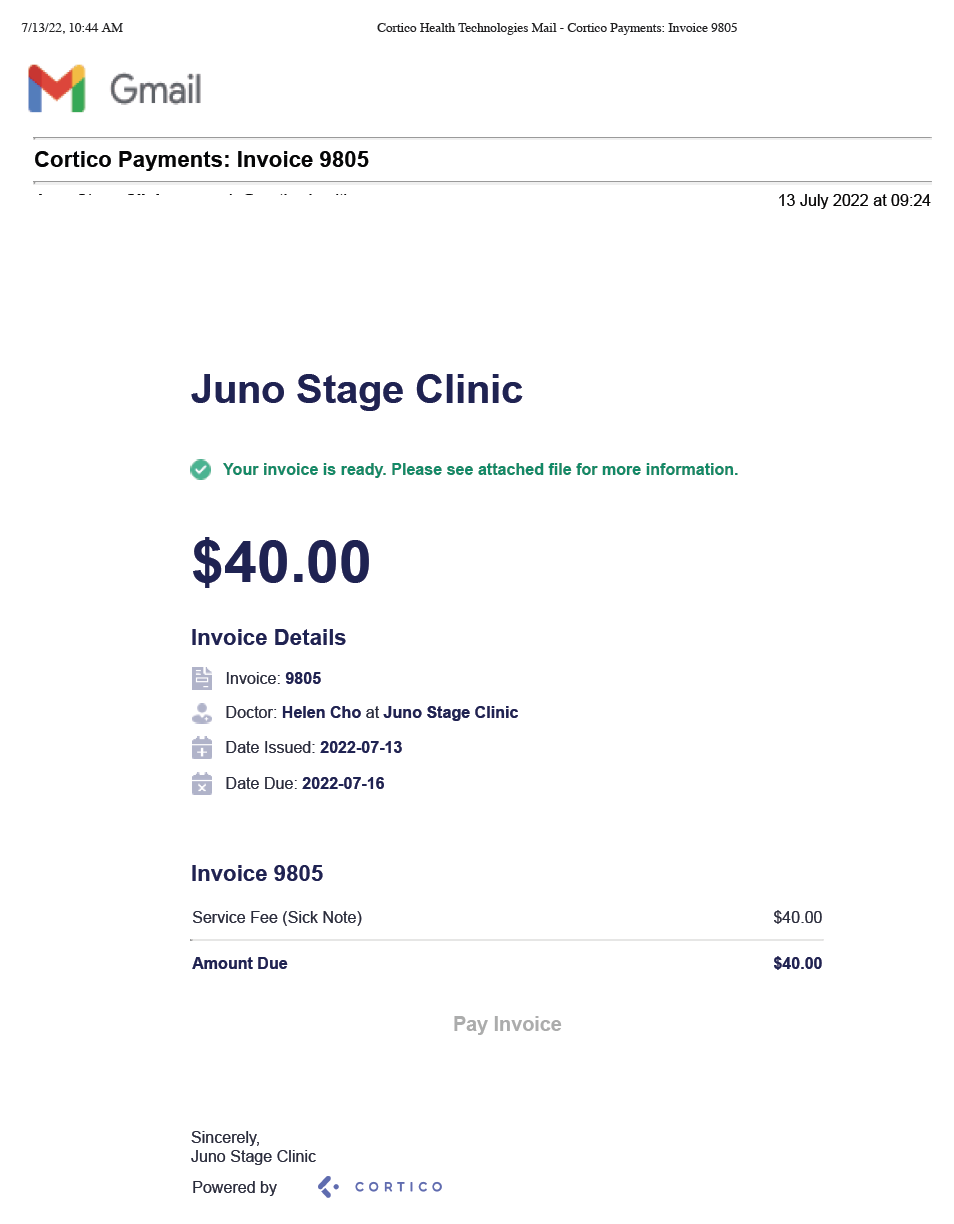
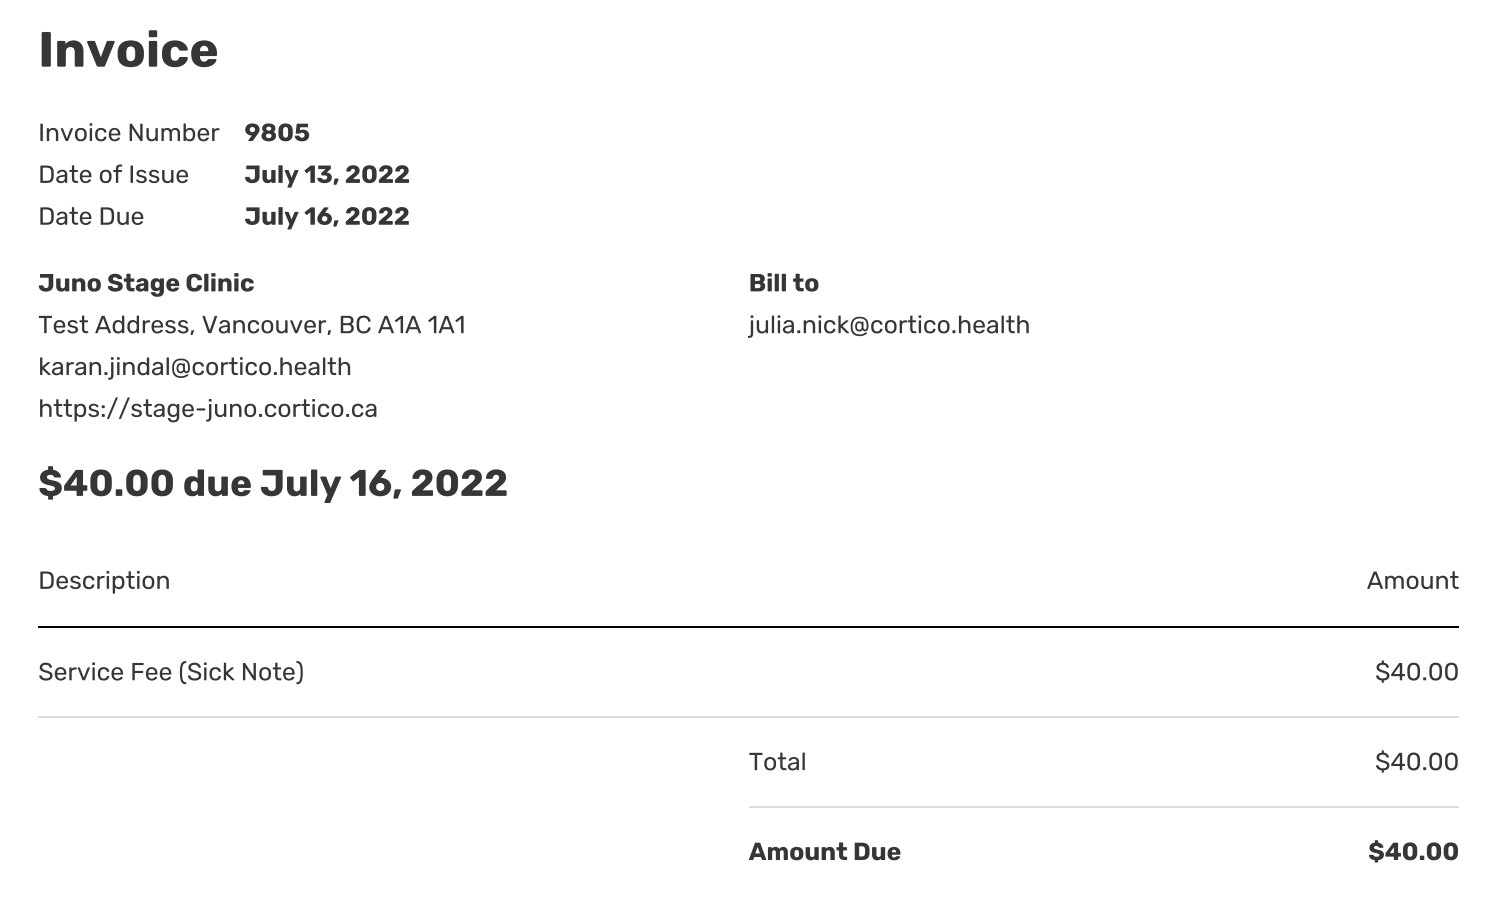
With a copy of the invoice:
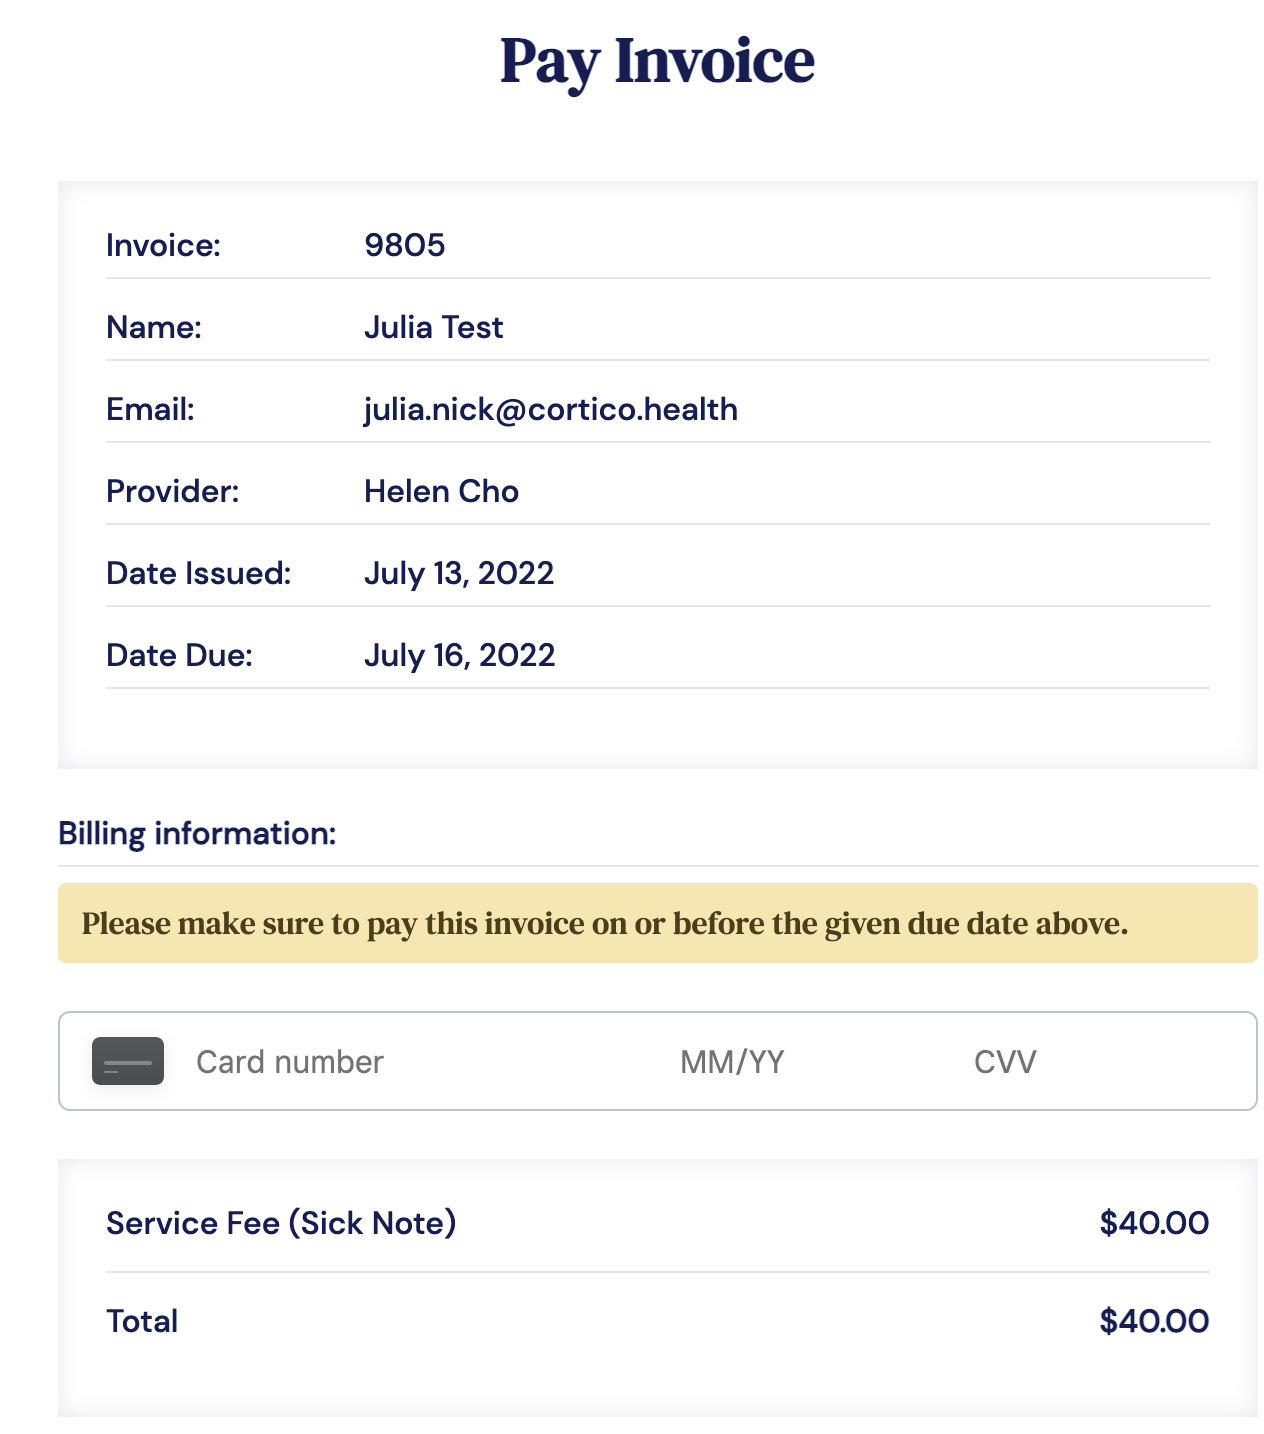
And a link to pay it:
Once their payment is made, they get another confirmation email including their receipt and a link to the attached document if used.
If the invoice hasn't been paid yet: Patients will also receive a reminder that their invoice is due the day before the due date.

For information on how to set up payments using square, see this link.
Please contact help@cortico.ca with any questions!