Welcome to Cortico's Knowledge Base
Official Cortico Product information for customers and users.

Cortico Features
Requesting Patients to Book Online
Step by step guide to request patients to book online.
Updated 1 week ago
Cortico offers a new feature that allows you to effectively triage referral patients and enable them to book appointments online.
This feature is currently offered in the Premium and Elite Packages. To view the different packages and a list of their features, you can visit this page: Here
You can create and email a unique booking link to patients to book within any specified booking range for their appointments. Patients will receive the custom booking link in an email with instructions for booking.
1.1 - Before you use this feature, please ensure you have the following completed:
You'll need a Cortico account. Contact help@cortico.health if you don't have one.
Add the workflow in Cortico Workflow Settings. Check out this article to learn how. Make sure to select "Request to Book (Premium)" for the workflow type or enable "Allow in Request to Book?".
Add the provider in Cortico Staff Settings. Check out this article to learn how.
1.2 - How do I use Cortico's Request to Book feature?
1. Go to clinicname.cortico.ca/request-to-book
2. If you are not currently signed into Cortico, you'll be prompted to login with your username and password.
3. Once signed in, you'll be redirected to the Request To Book page.
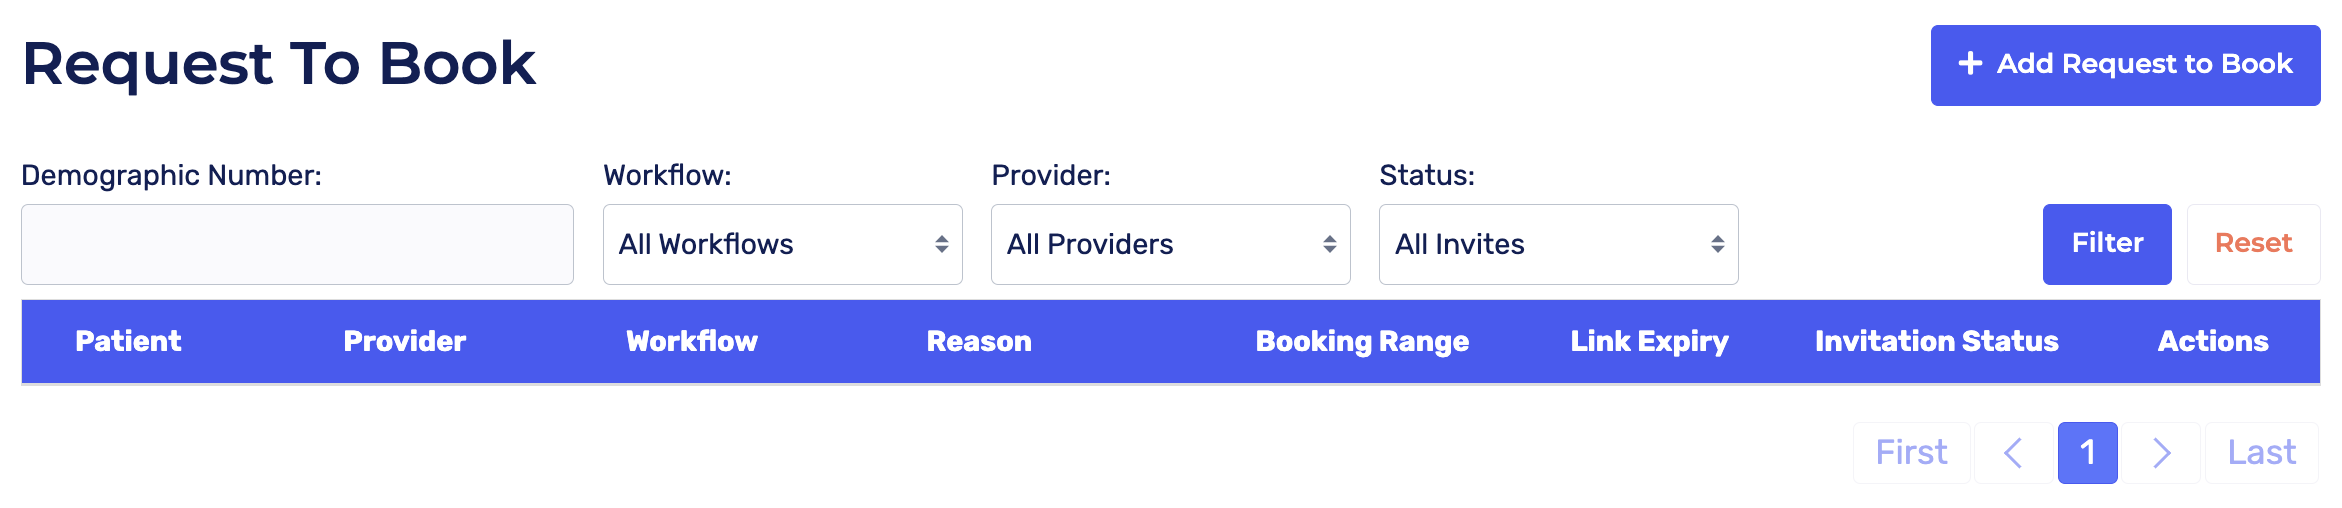
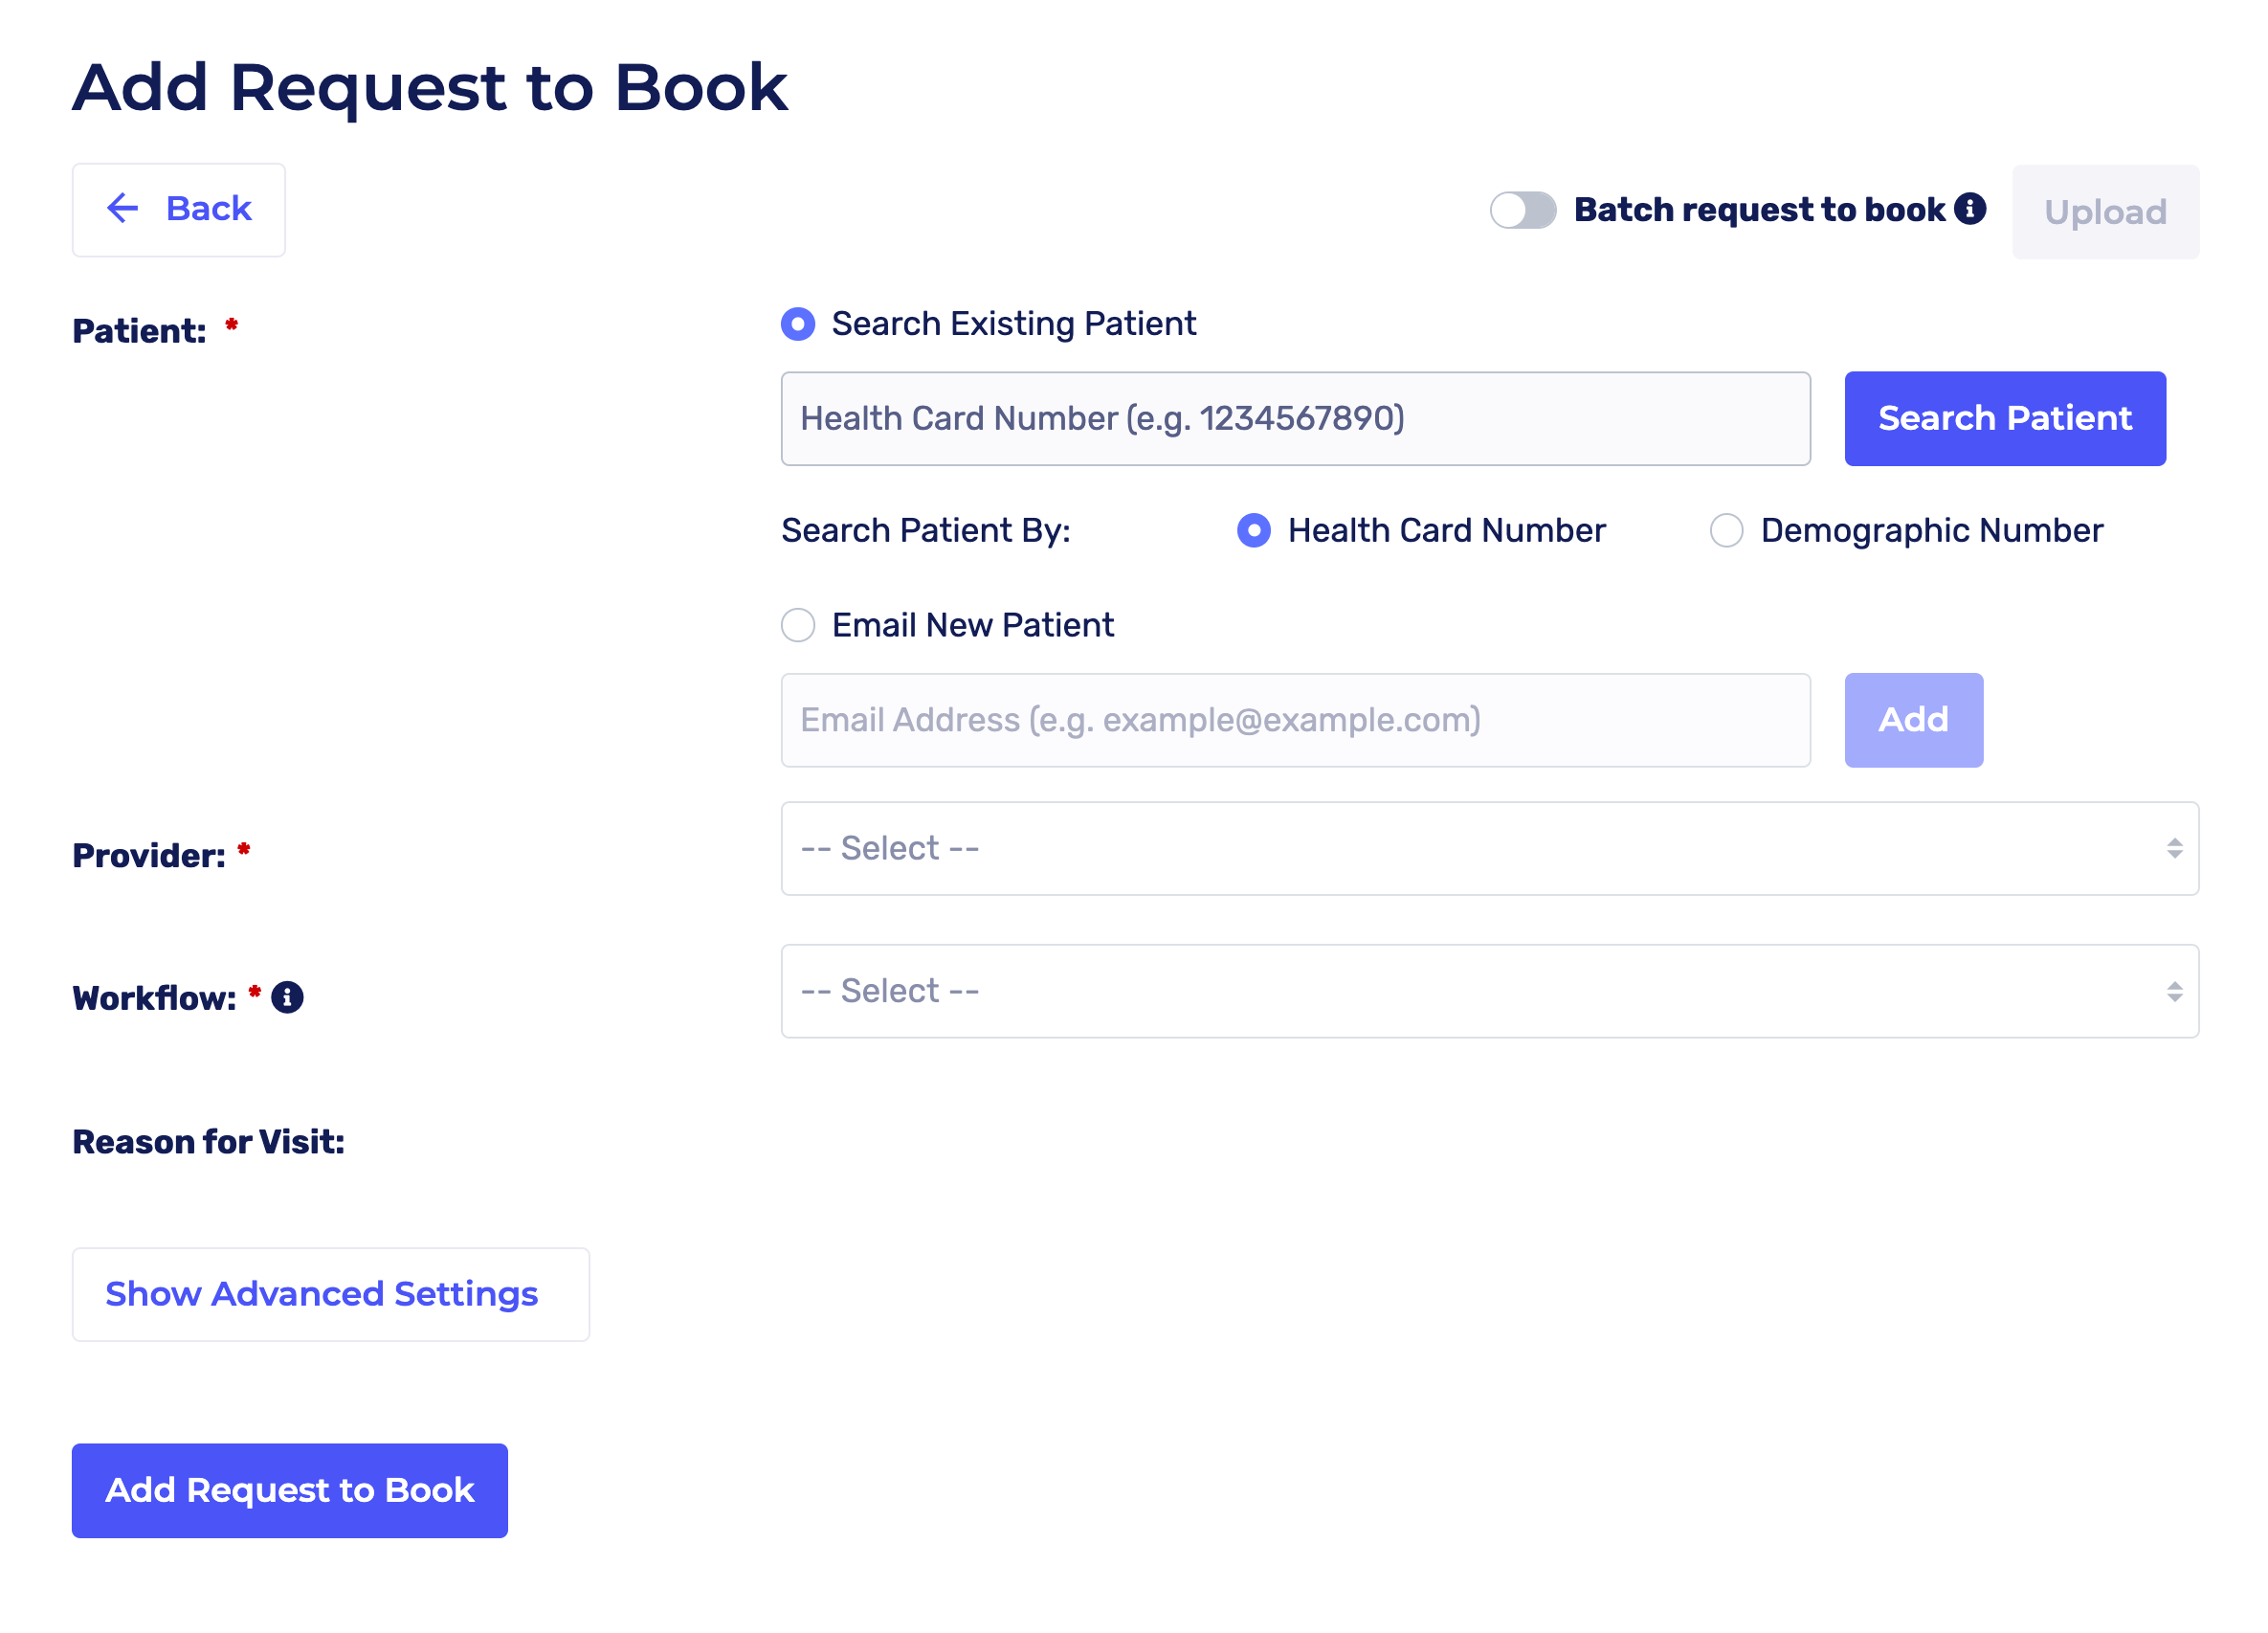
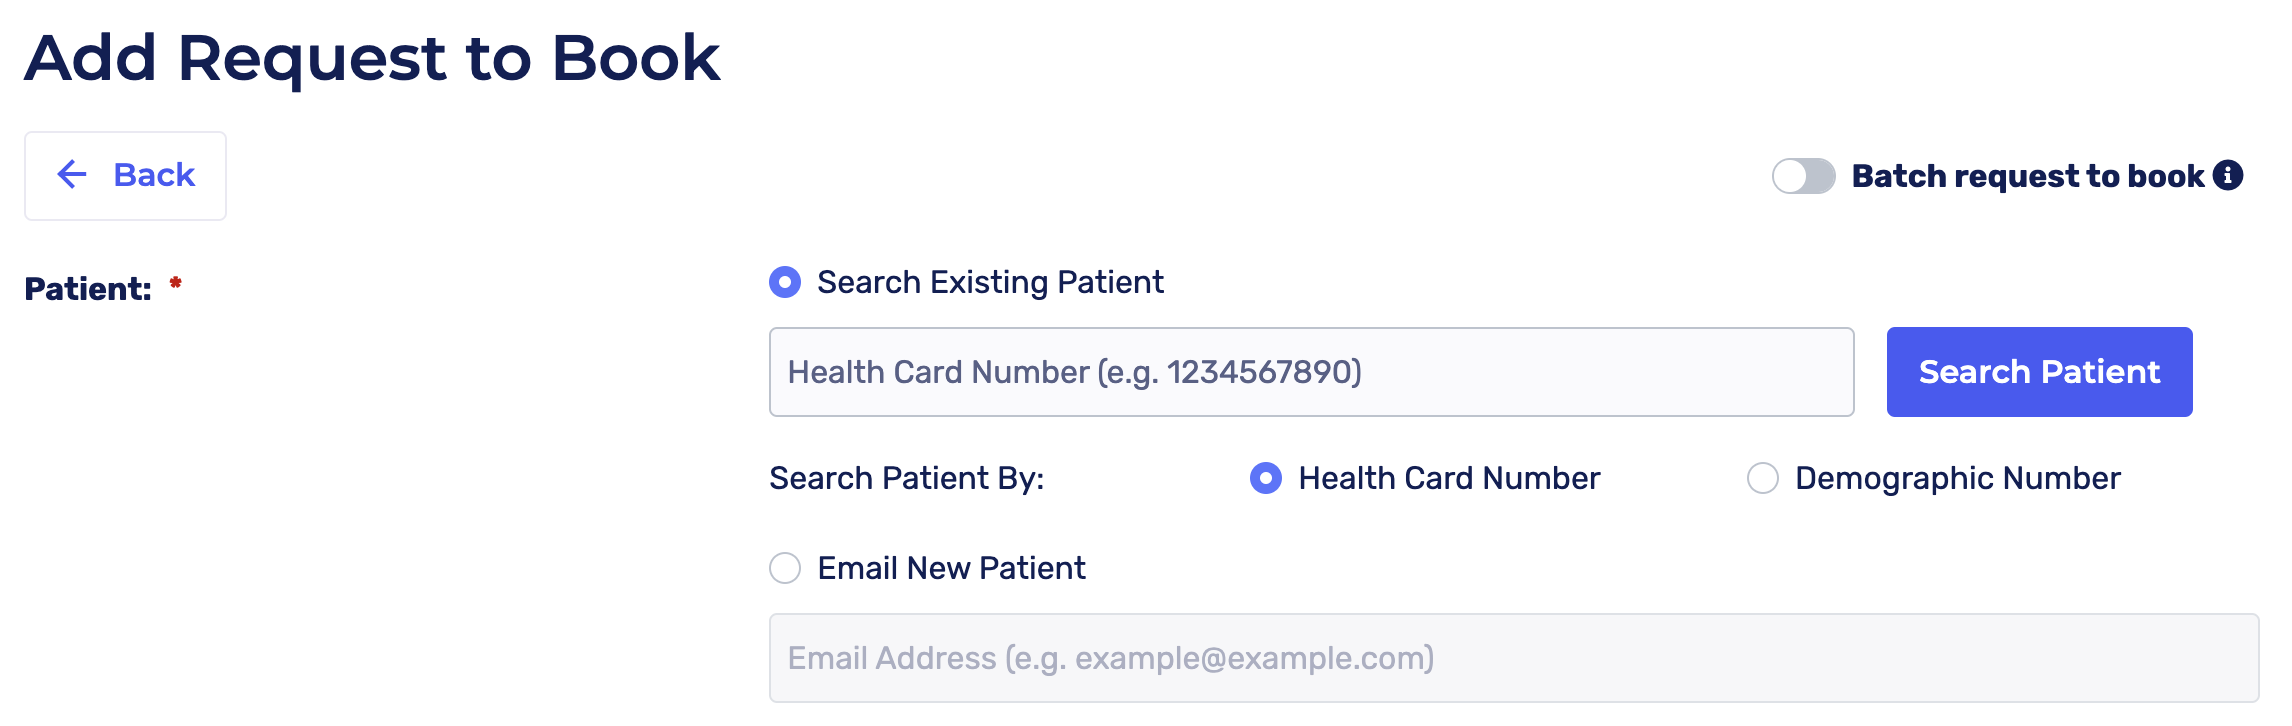
4. To request a patient to book, click "Add Request to Book".

5. Enter the patient's health card number or demographic number and click "Search Patient." If you are requesting a new patient who is not in your EMR to book an appointment, you can click "Email New Patient" and enter their email address instead.
6. Once the patient has been selected, select a provider by clicking on the “Provider” drop-down list.
All providers you added in the Cortico Staff Settings (refer to step 1.1) will be displayed here.

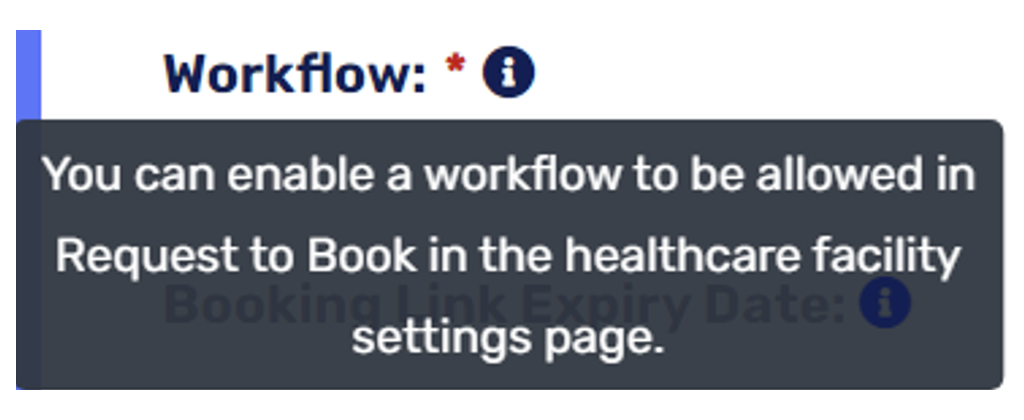
7. Next, select the workflow by clicking on the “workflow” drop-down list.

Note: By default, only workflows with the workflow type "Request to Book (Premium)" will show under "Workflow." Workflows of other types that are not "Request to Book" will need to be enabled in the settings page in order for them to populate under the "Workflow" drop down menu.
8. How would the provider like to see the patient?: Specifying the appointment medium so that it is the only option that appears for the patient. The last used medium selection will be applied when creating a new Request to Book.

9. There are some additional options under the "Advance Settings" section. These include:
a. Booking link expiry date: Patients will not be able to book an appointment using the booking link after the expiry date.

b. Set roster dates: Enabling this toggle would set the patient's roster date to their appointment date & roster termination date 6 months after the appointment. This changes the appropriate fields in the patient’s master file. Use this feature if you intend to make this a subscription-based feature.
c. Reason for Visit: Pre-select or type in a Reason for Visit for the patient. Please let us know if you want us to add any reasons for any workflow.
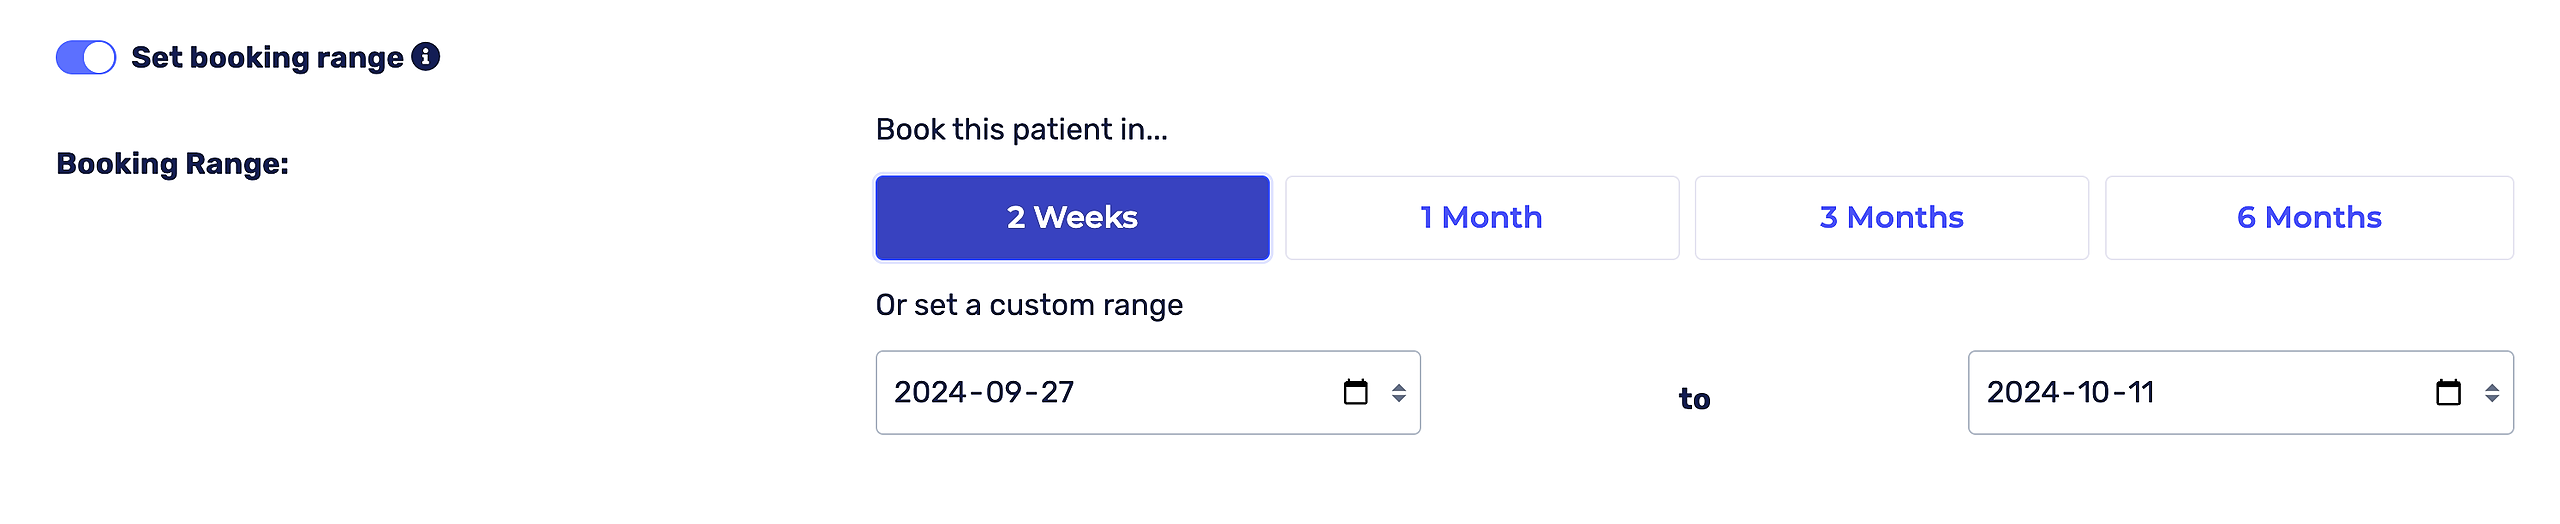
d. Set booking range: You can select one of the pre-defined options, or set a specific booking range if desired. If no booking range is specified, available dates will start from the first available date up to 30 days, or the last used booking range will be applied.

10. Click "Add Request to Book". You'll be redirected to the page below showing all specialist bookings and you'll receive a green message indicating that the request to book was successfully added.
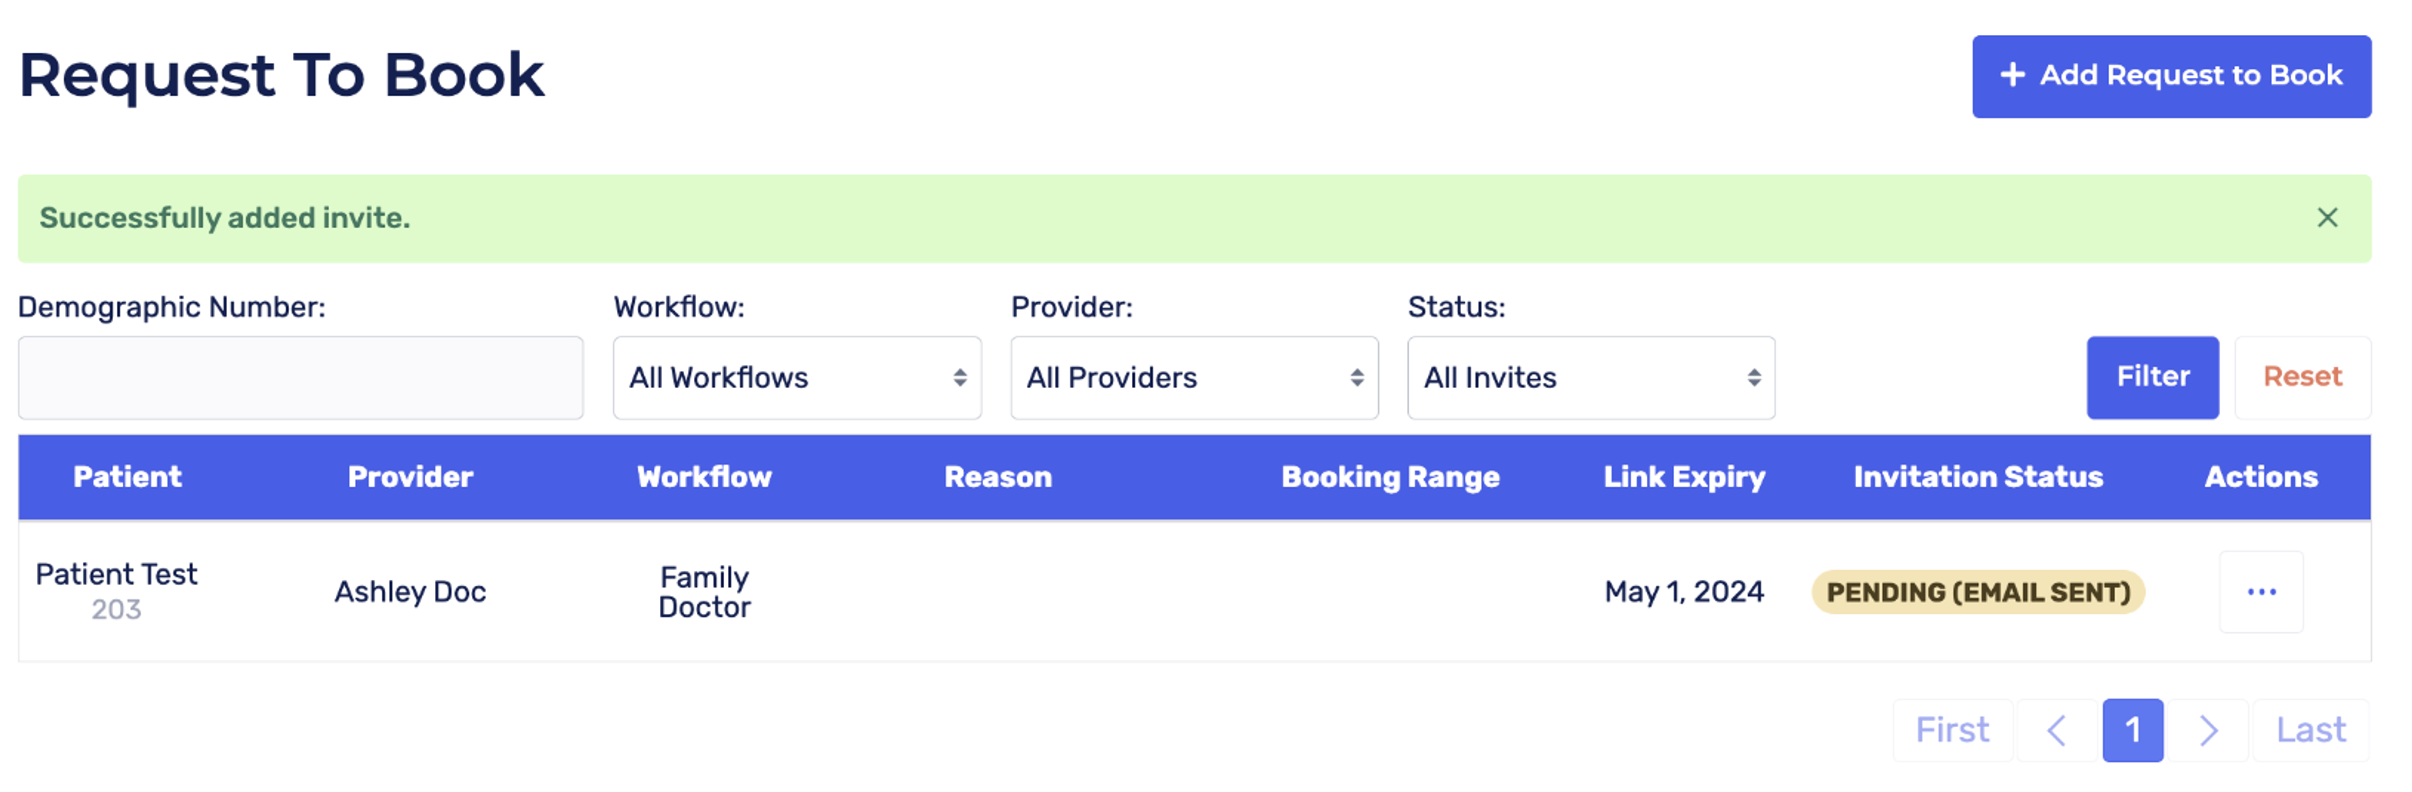
Patients will receive an email/SMS with their booking link and instructions on how to book their appointment. Check out 1.4 - How do patients book their appointments? Below to learn more!

To access additional options, click the three dots under "Actions" to open a drop-down menu. This menu provides the following options:
Copy Invite Link
Resend Link via Email
Resend Link via SMS
Edit
Archive
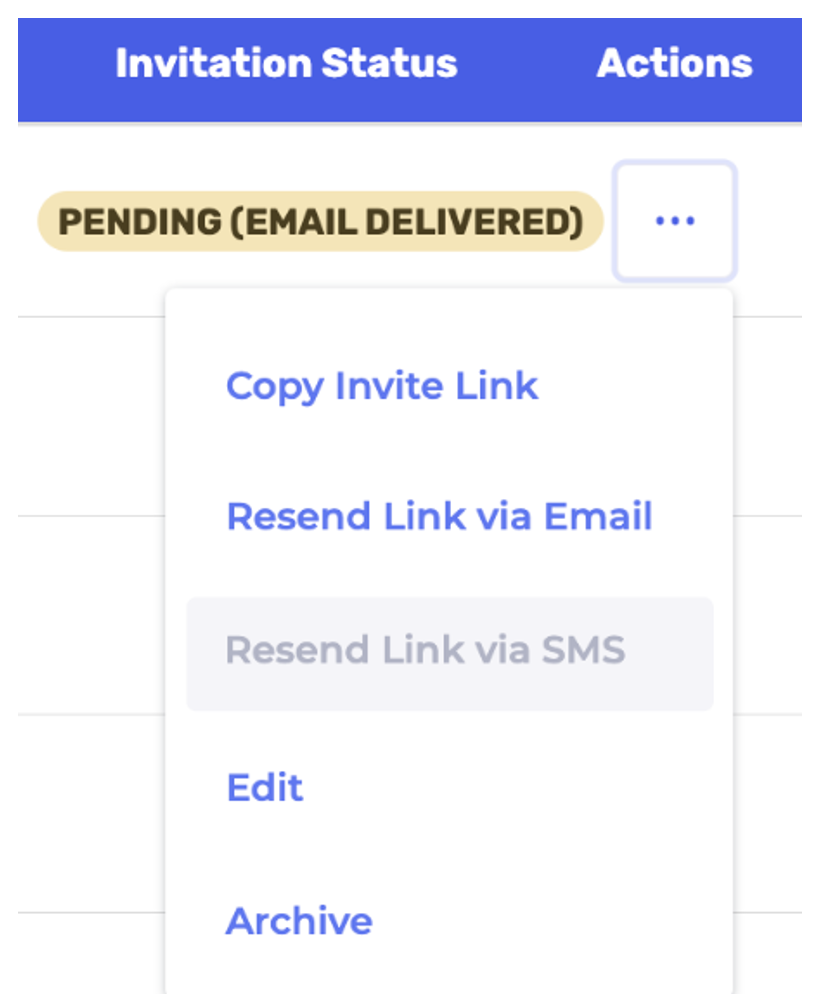
You may also click "Copy Invite Link" if you'd like to copy and paste the link in a message to send to the patient yourself.
Click "Resend Link via Email" to send the booking link directly to the patient. Once the email is successfully sent, you'll receive a green message indicating this.

Note: Patients receive an email and SMS notification when a Request to Book is created. We also send email reminders if the patient hasn't booked yet 14, 7 & 3 days before the booking link expires and an SMS reminder one day before the booking link expires.
Reminders:
1.3 - How do I view the statuses of the invites I have created in Cortico?
The dashboard displays all specialist bookings and their Invitation Statuses. The status indicates whether the appointment is Pending (not booked yet), Expired, or Booked (with a booking date).
Booked invitations are highlighted in green, expired invitations are shown in red, while pending invitations are displayed in yellow.
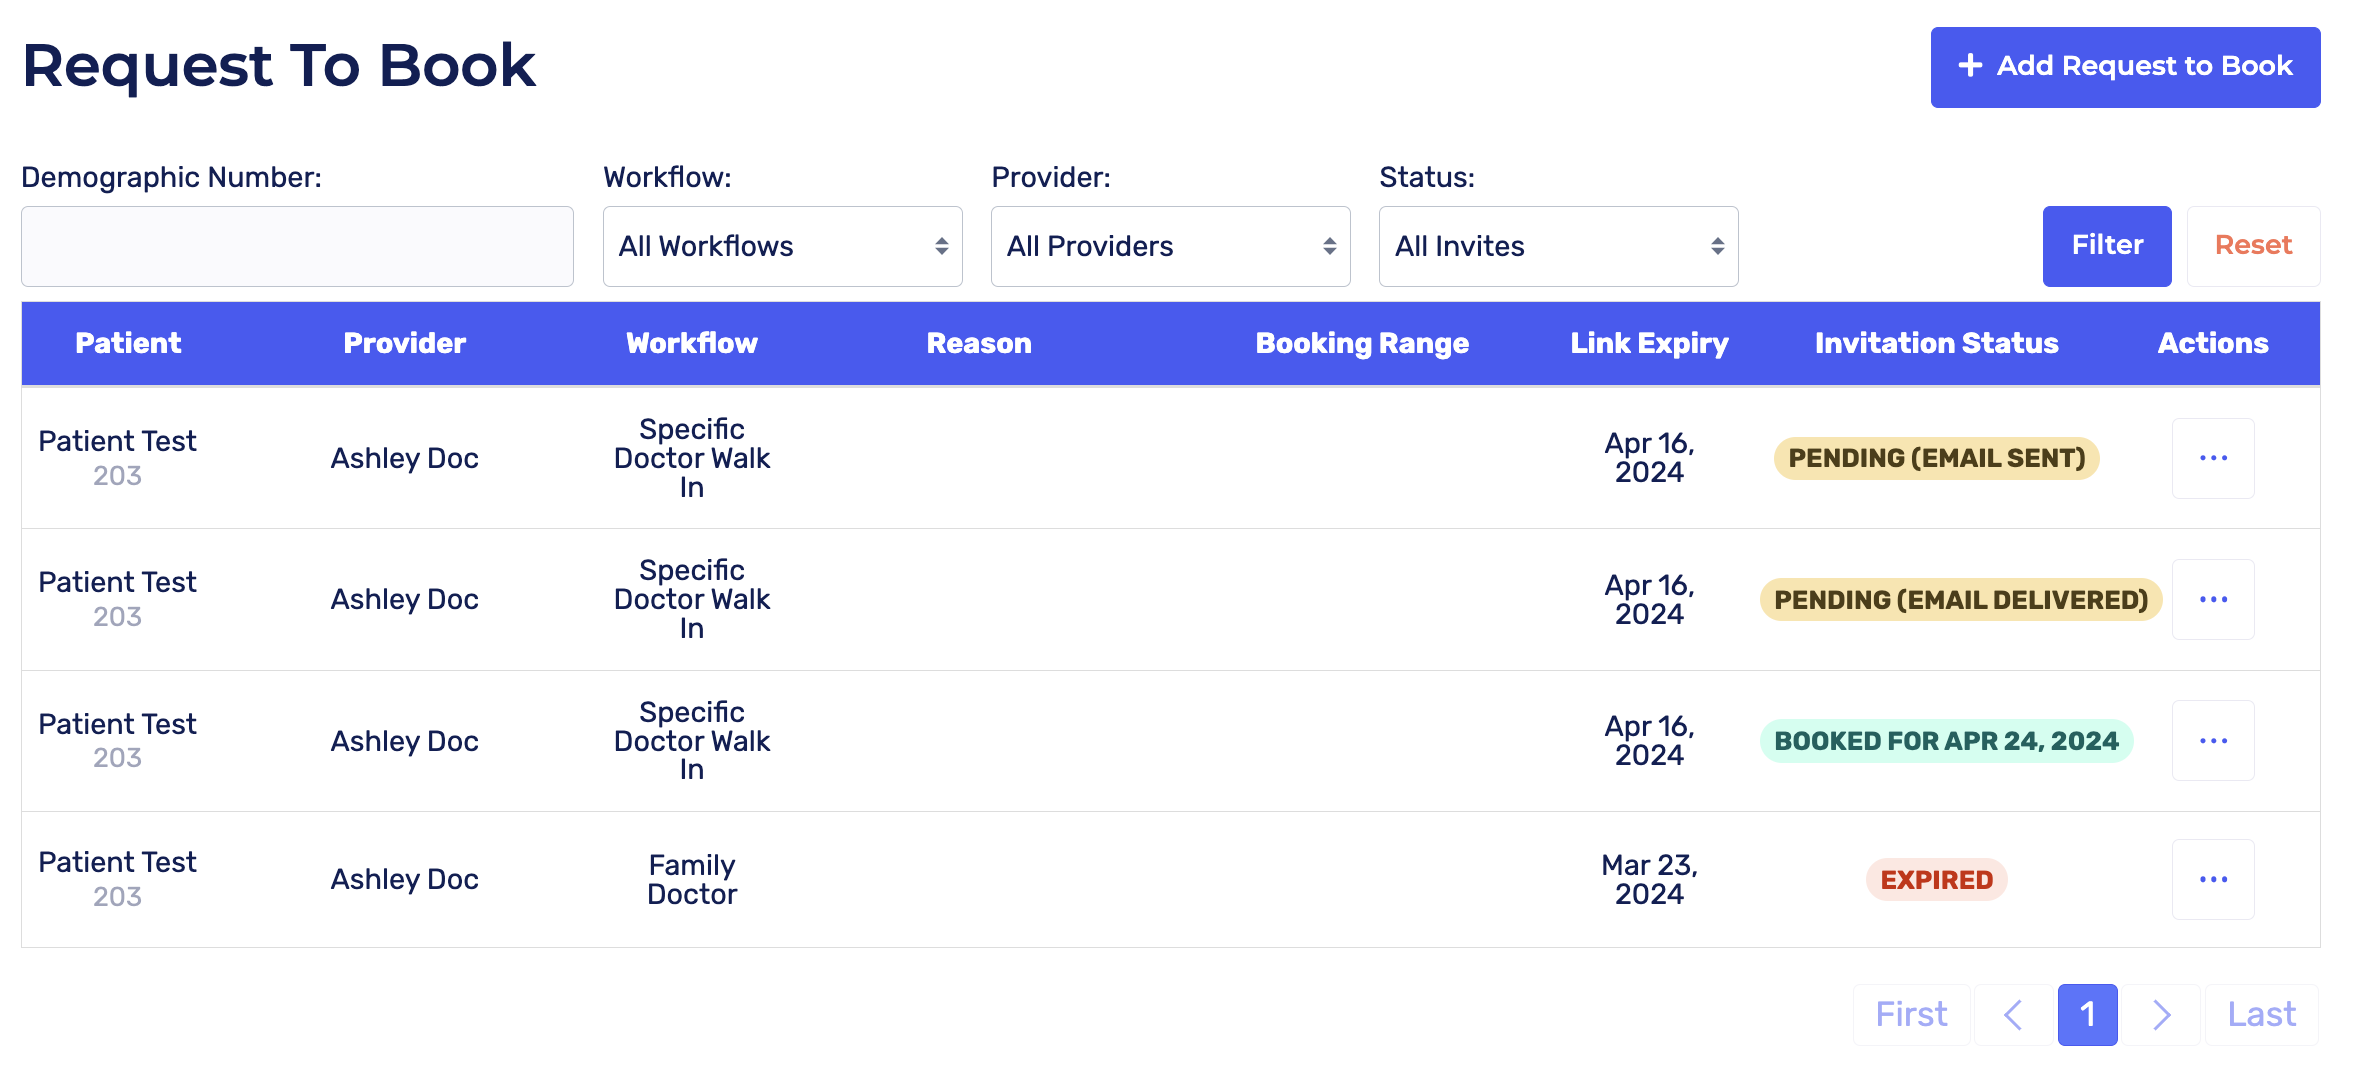
You can also use the filter option to filter by Demographic Number, Workflow, Provider, or Status.
1.4 - How do patients book their appointment?
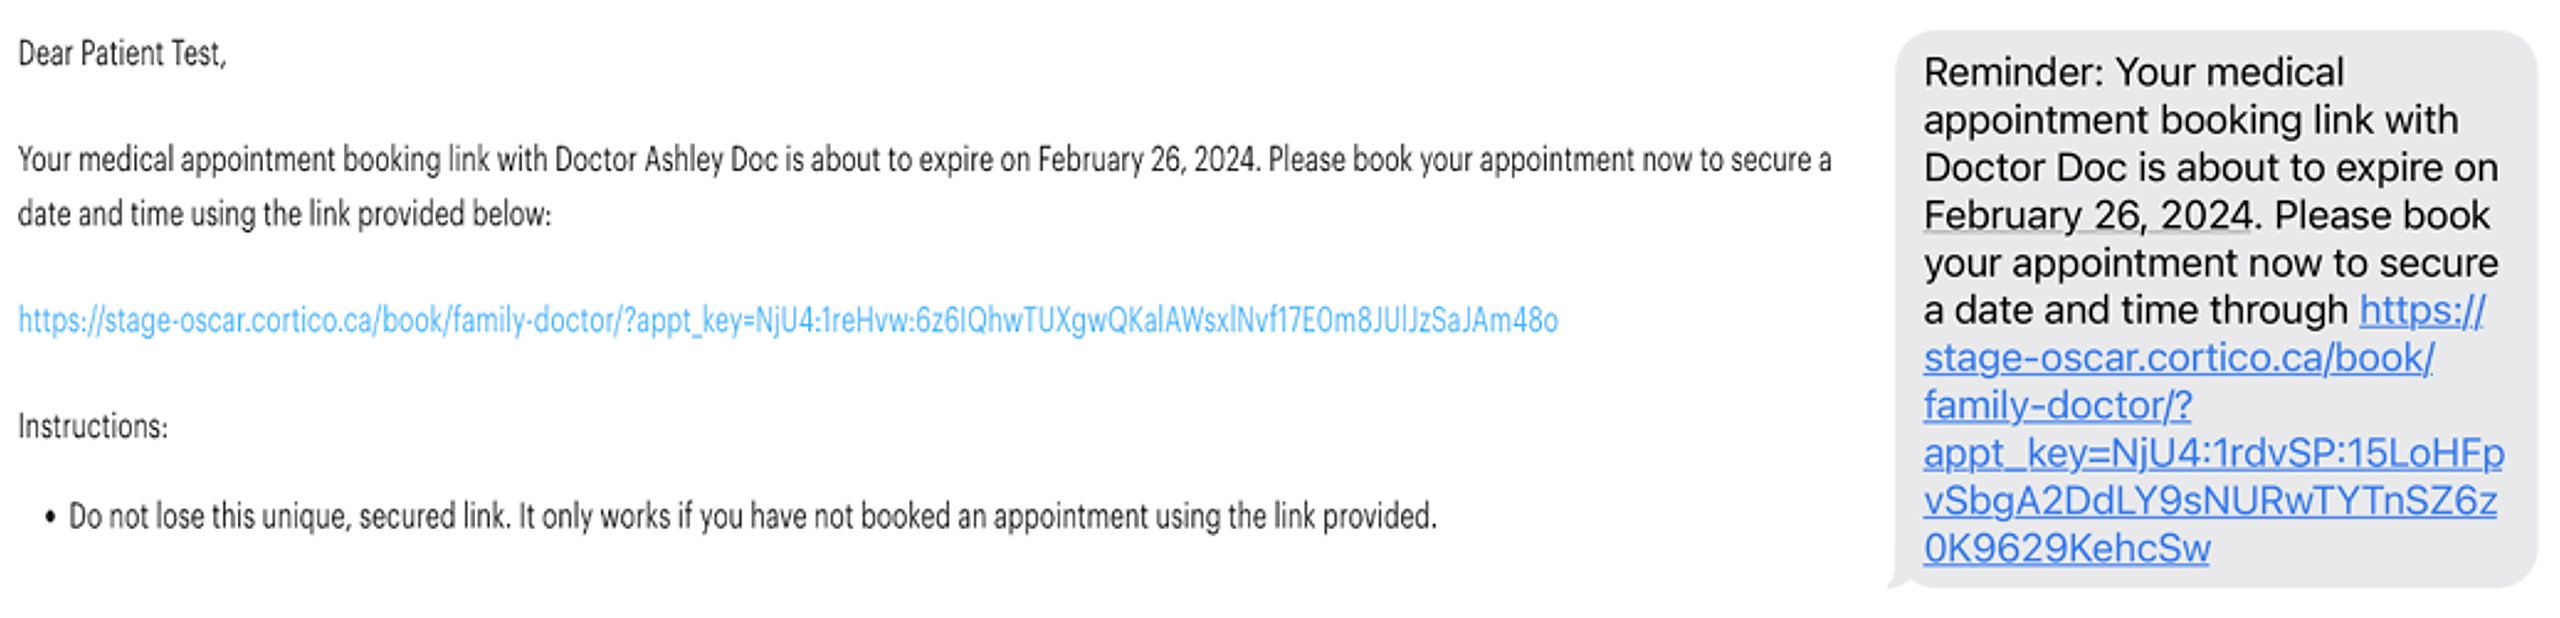
Patients will receive an email containing their unique booking link and instructions regarding the booking range they can select from.
Using this link, patients can book their specialist appointments in the same manner as they would for other regular appointments. If they have to re-schedule, they can cancel and use the same link to re-book as long as the invite hasn't expired.
Watch this video to see how patients can book their specialist appointment: