
⚠️ Availability - This feature is only available and supported on OSCAR Pro.
Where to Access “Upload to EMR”
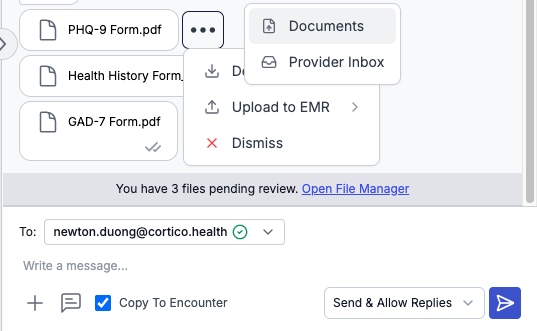
After selecting Upload to EMR, you will see two options: Documents or Provider Inbox.
This feature is available from:
The Scheduling page
The patient’s eChart
The File Manager
Option 1: Upload to Documents
Use this option to upload a file directly to the patient’s chart.
Steps:
Select Upload to EMR → Documents
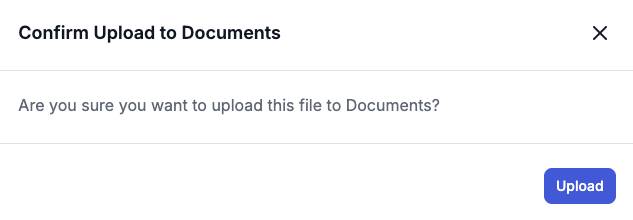
A confirmation pop-up will appear
Click Upload
What happens next:
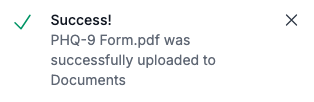
A success message will appear
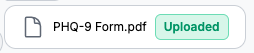
The file will display an “Uploaded” tag in the conversation
After refreshing the page, the file will appear under the Documents section in the patient’s chart.
Option 2: Upload to Provider Inbox
Use this option to send a file to a provider’s inbox while also saving it to the patient’s chart.
Steps:
Select Upload to EMR → Provider Inbox
A new window will open with pre-filled details:
Date (auto-filled, not editable)
Patient name (auto-filled, not editable)
File name (auto-filled)
Select a provider from the dropdown or search for them
Enter a description (required)
The file name will automatically update to match the description
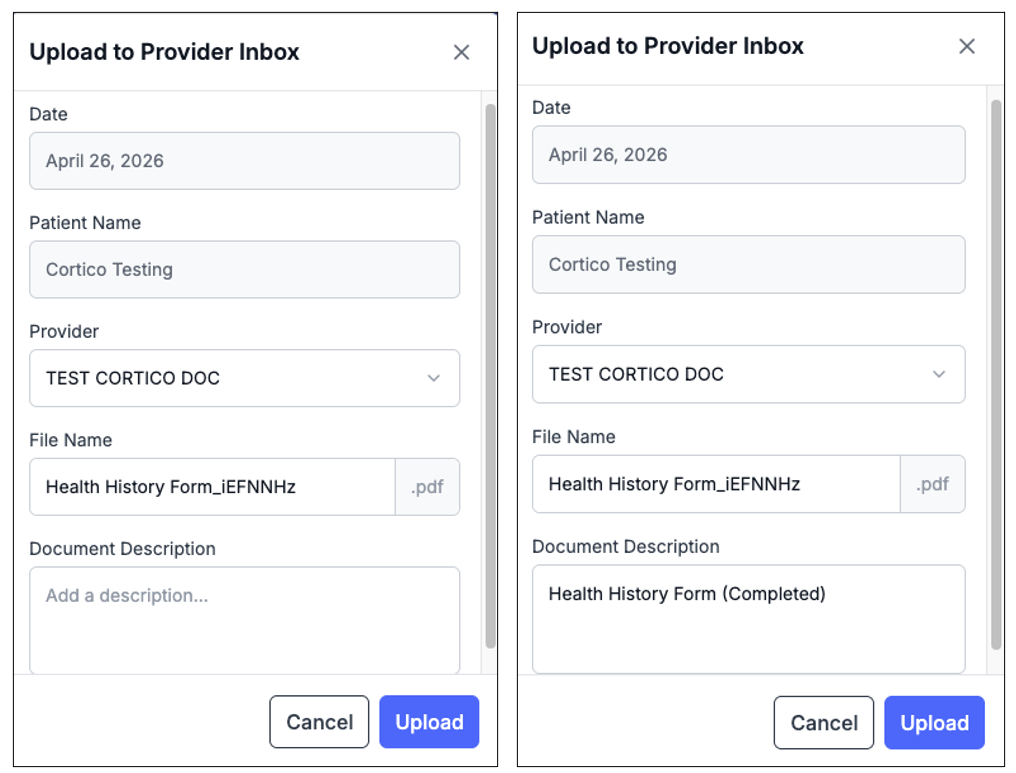
Click Upload
What happens next:
A success message will appear
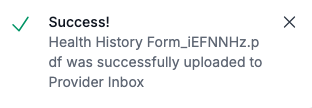
An “Uploaded” tag will appear beside the file

The file is sent to the provider’s inbox
The file is also saved under the patient’s Documents section
Additional Notes
Files can also be uploaded directly from the conversation screen by clicking the three-dot menu on a file
The same Documents and Provider Inbox options will be available
Uploaded files are clearly labeled with an “Uploaded” tag for visibility across users
Key Takeaways
Two upload options: Documents or Provider Inbox
Provider Inbox uploads also save to the patient’s Documents
Auto-filled fields (date and patient name) help reduce manual entry
Description is required and updates the file name automatically
Uploaded tag confirms the file has been successfully sent to the EMR