

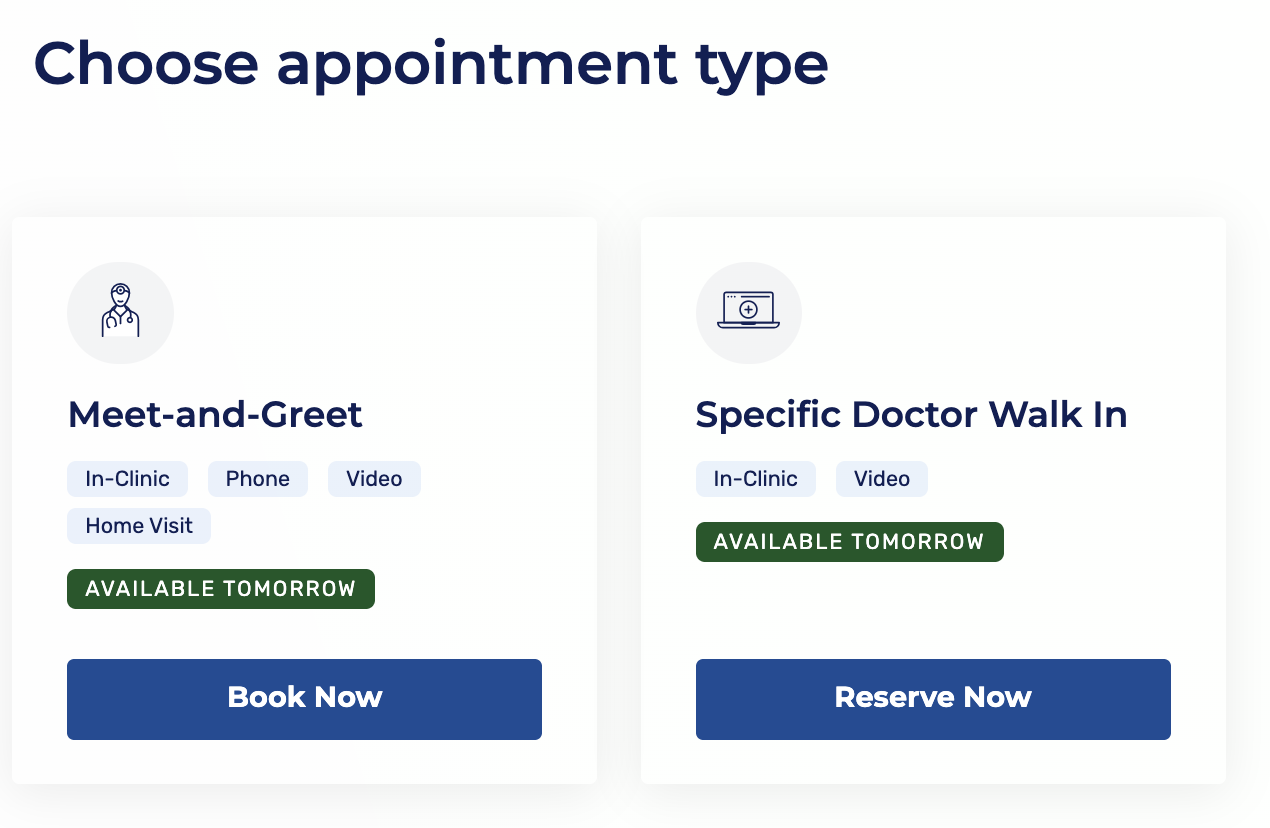
Step 0: Choosing an Appointment Type
Patients start by selecting the type of appointment or workflow they want to book.
Cortico allows clinics to customize these workflows to fit your practice.
Once you’ve decided to proceed with Cortico, we’ll meet with you to set up the workflows and appointment types that patients can start booking online.
Step 1: Patient Identification
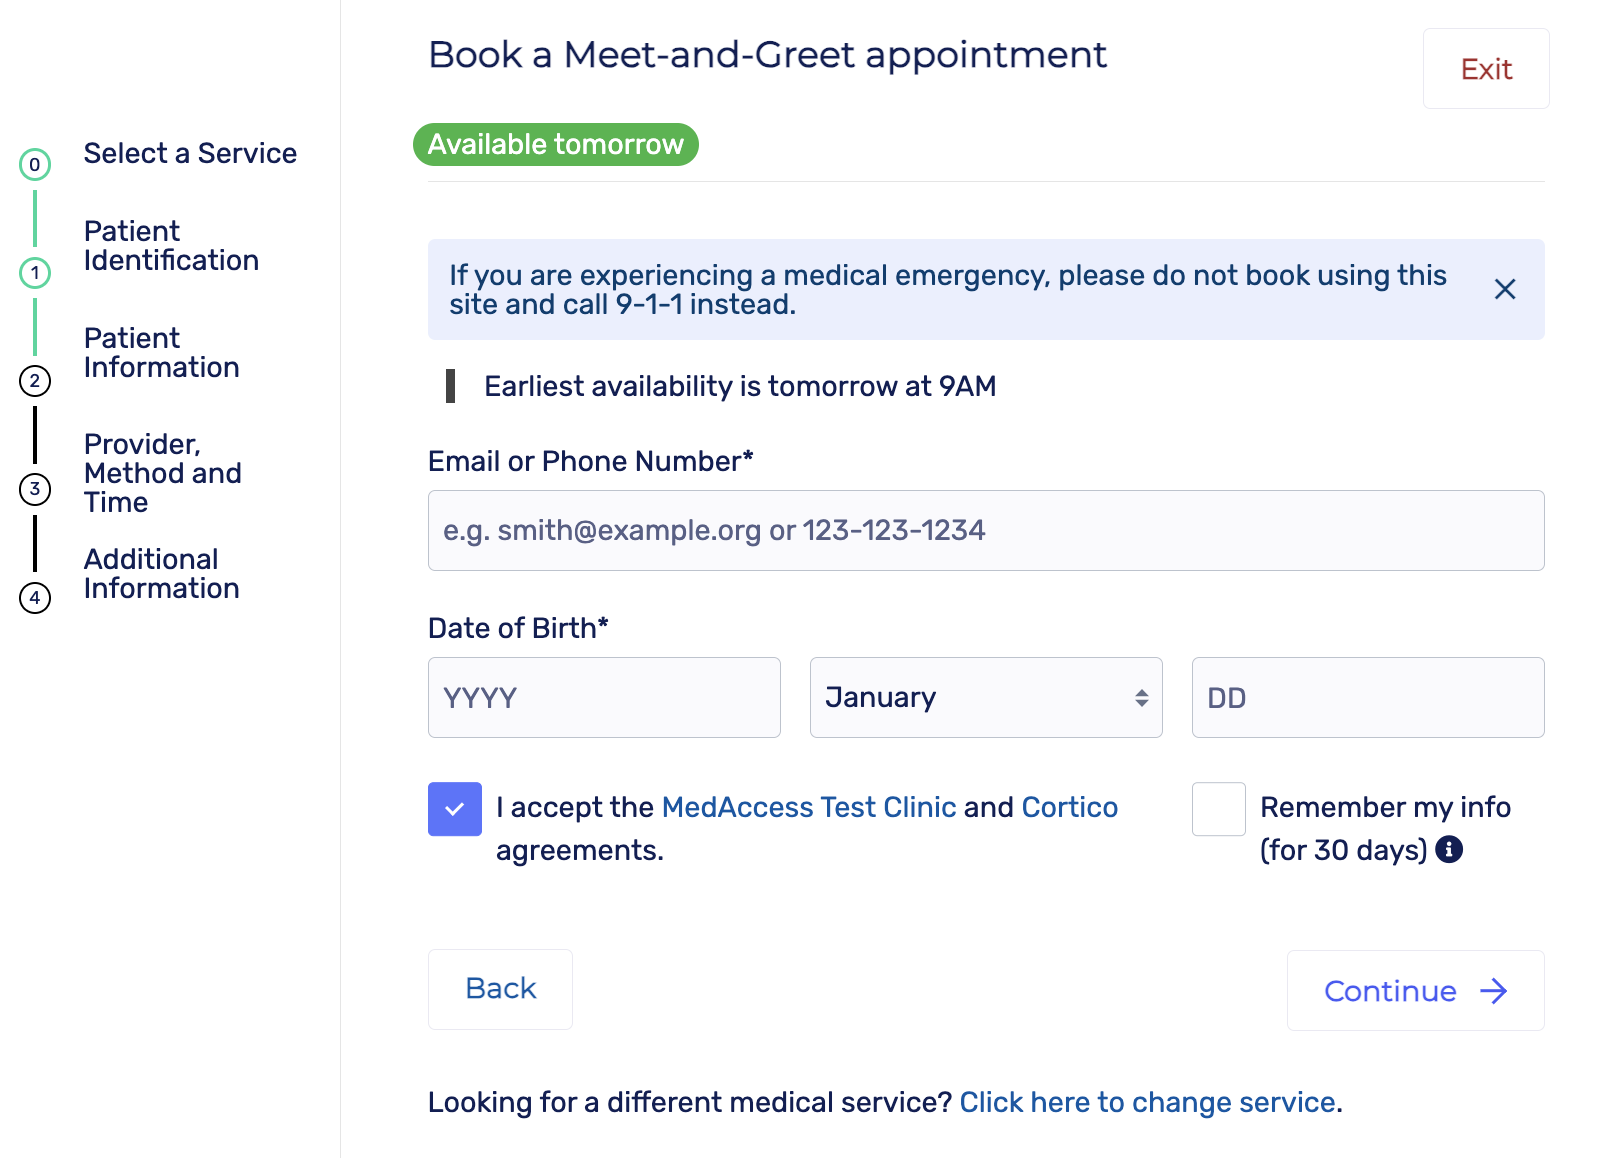
Patients enter their email or phone number and date of birth to begin.
Cortico does not require patient accounts—it connects directly to your EMR.
Patients must accept your clinic’s agreements and Cortico’s terms.
Optionally, they can remember their info for 30 days, making future bookings faster.
Step 2: Patient Information
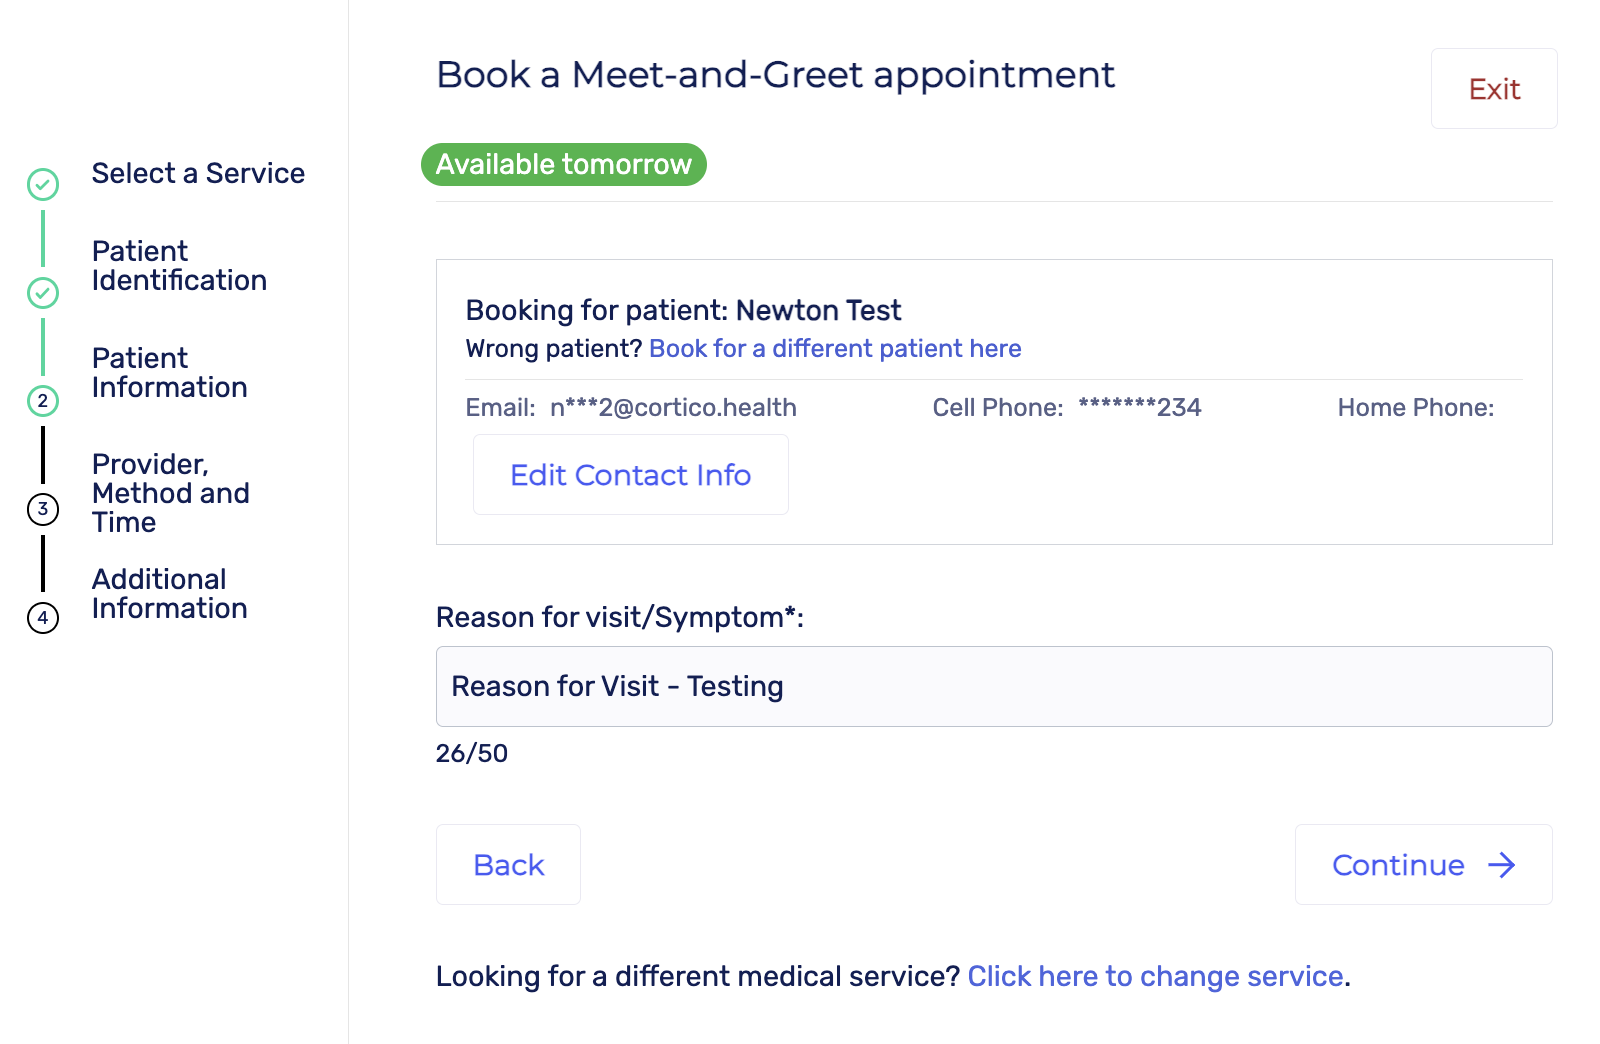
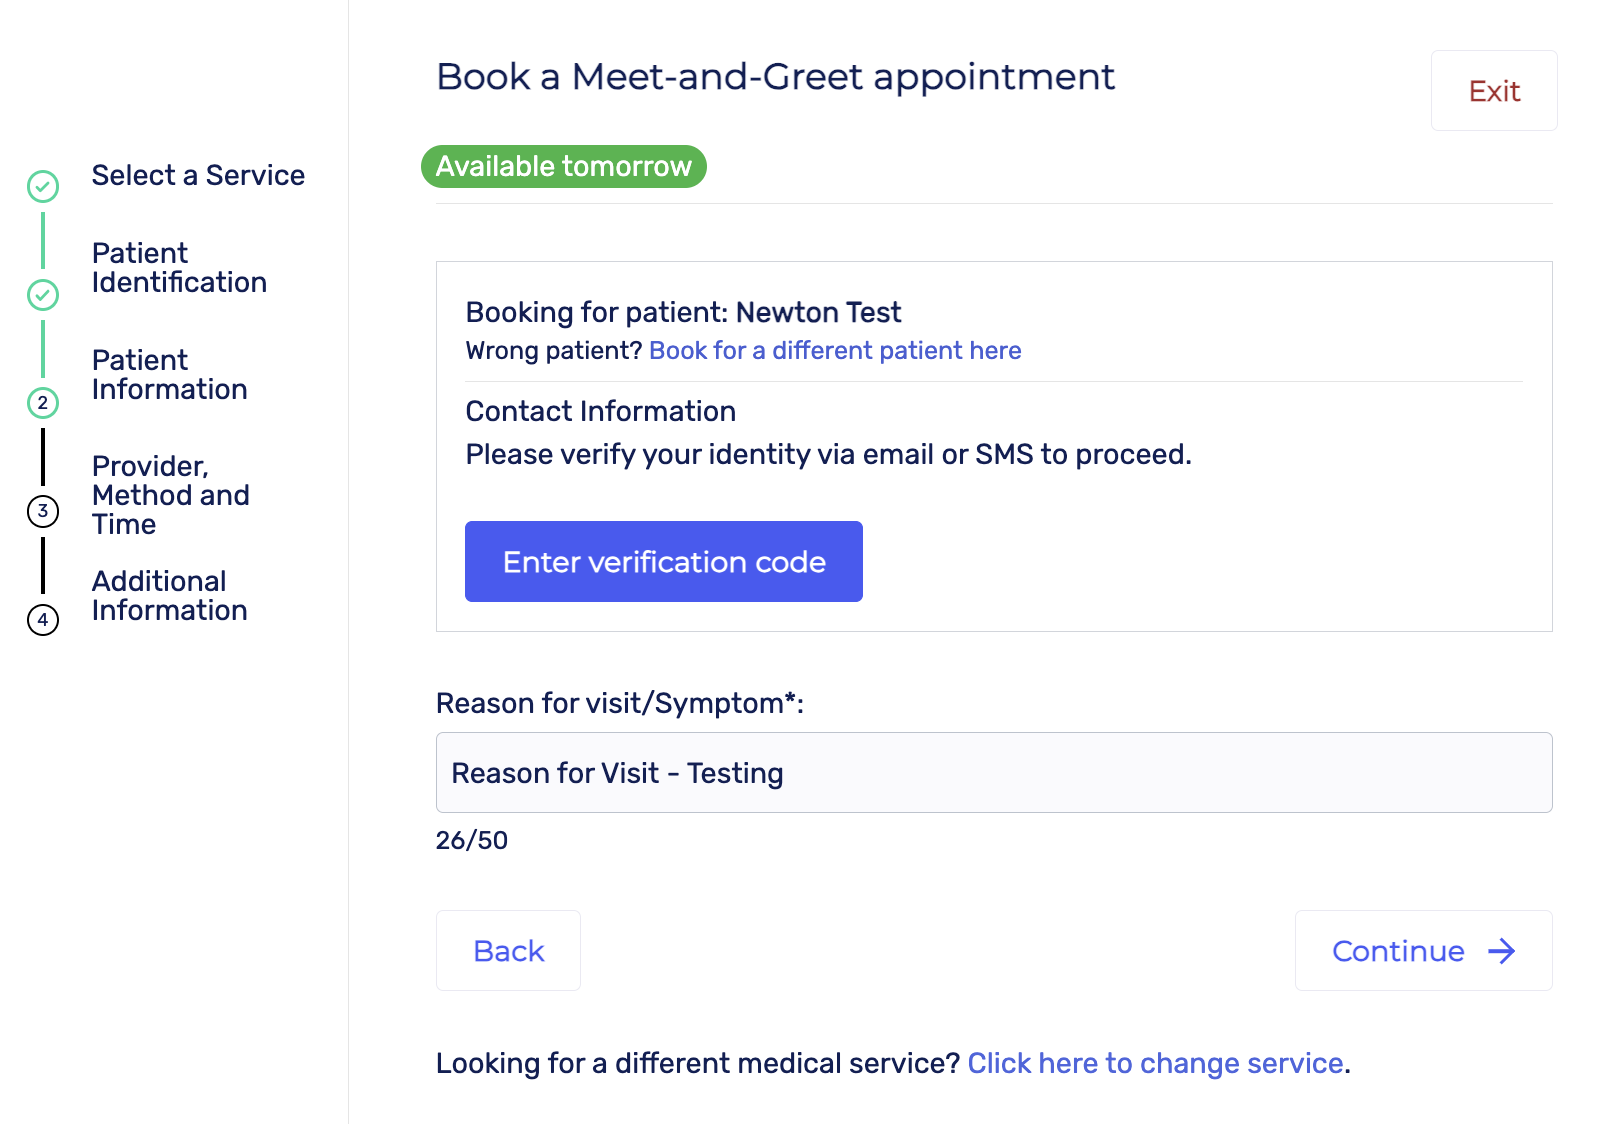
Patients see their contact info at the top of the screen (full name, email, phone numbers).
Editing contact info requires verification, and any changes automatically update in Med Access.
Patients will also provide a reason for their visit in an open text field.
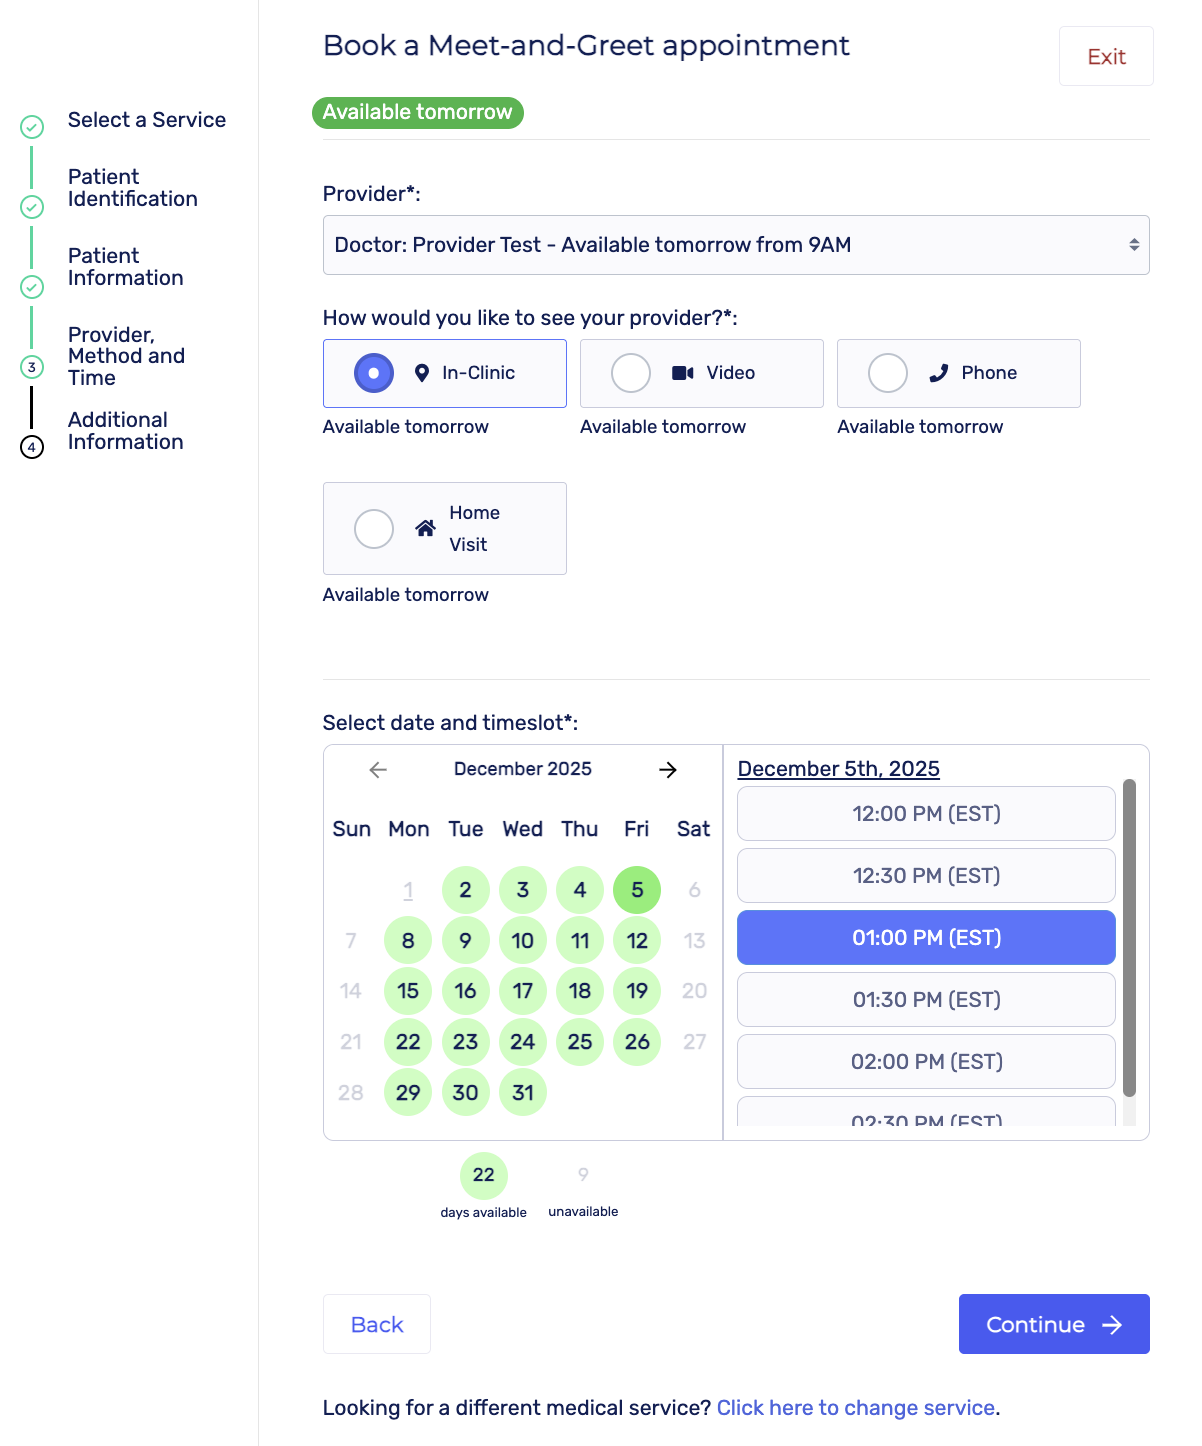
Step 3: Provider, Method, and Time
Patients select their provider based on the workflow you’ve set up (i.e. Family Doctor Workflow, Non-Rostered Workflow).
They will also choose how they’d like to see their provider (in-person, phone, video, home-visit). These options are customizable to your practice.
Finally, patients choose the date and time that best fits their schedule
Step 4: Additional Information & Booking
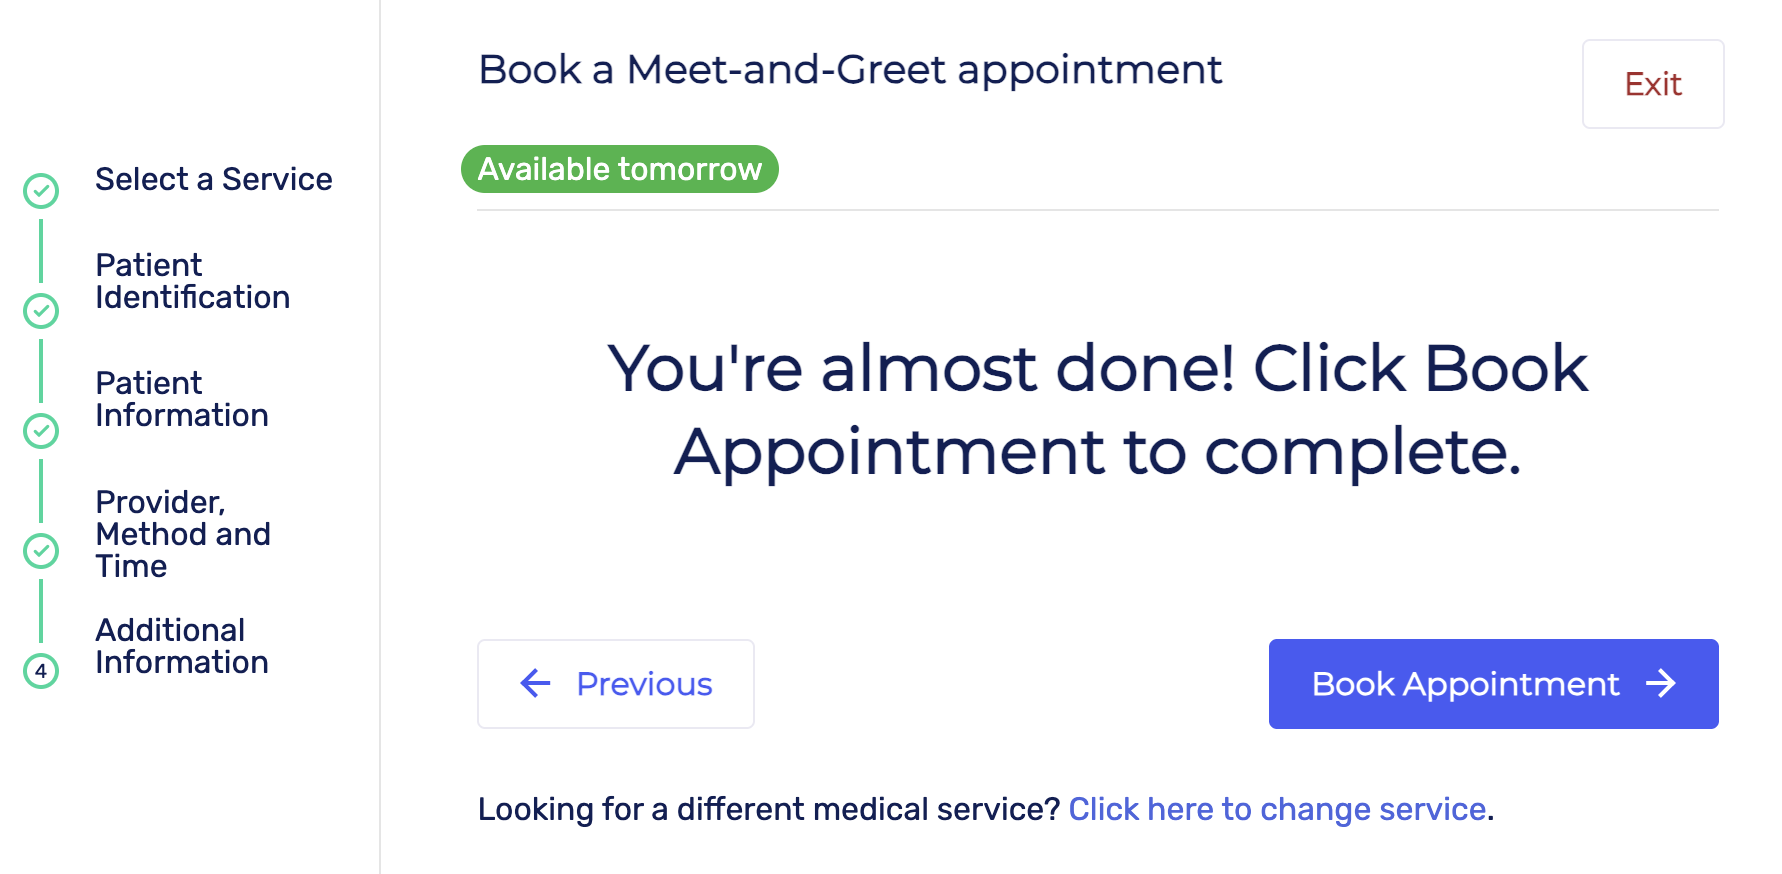
The final step is for patients to click “Book Appointment” to complete the process.
Confirmation Page
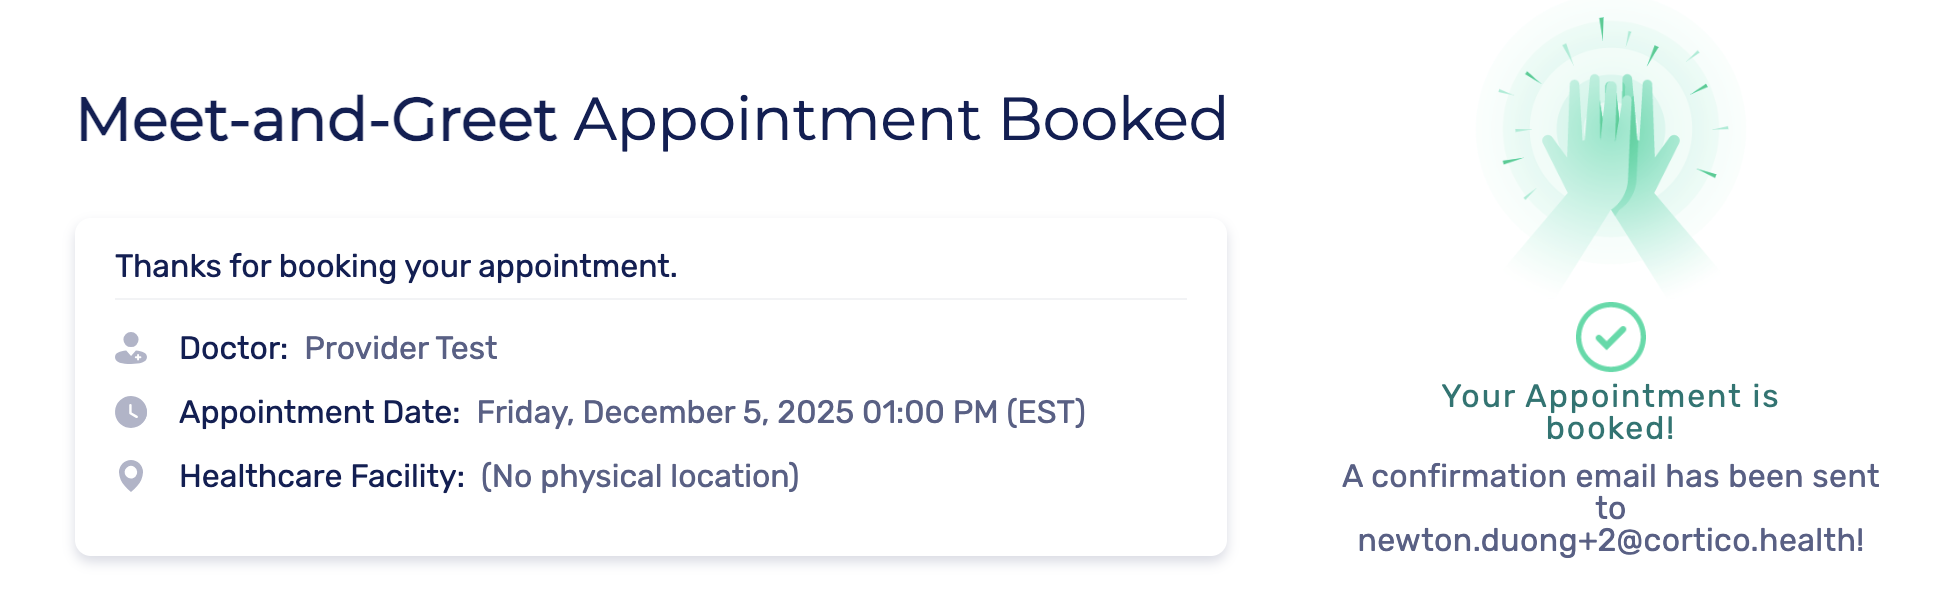
Once booked, patients are redirected to a confirmation page showing:
Doctor Name
Appointment Date & Time
Clinic Address
A confirmation email is also sent automatically.
How Appointments Appear in Med Access
Booked appointments automatically appear in Med Access with the correct appointment type.
Initial status is “Booked”; If the patient decides to confirm their appointment from their email booking confirmation, the appointment status will be updated to “Confirmed” in Med Access.
Under the Concern Resource column, the appointment medium will appear in square brackets [Clinic]. This indicates that the patient selected in-clinic as their preferred method of visit and also helps distinguish appointments booked via Cortico.
Beside that, the patient’s reason for visit will also be displayed.


With Cortico, booking online is simple for patients and seamless for your practice. Appointments booked through Cortico will appear in Med Access, giving you a real-time view and making scheduling more efficient while reducing administrative tasks.
Cortico works well for clinics using TELUS EMRs. Cortico has no formal business relationship with TELUS.