
This guide explains how to configure a provider’s schedule in Accuro so patients can book appointments online through Cortico.
The process has three main steps:
Create Appointment Suggestions
Create Suggestion Templates
Apply the Template to a Provider
Step 1: Create Appointment Suggestions
Appointment Suggestions define the types of time slots patients can book online.
Tip:
If the provider prefers certain appointment types (e.g., in-person vs. virtual, or specific visit types) to be booked at particular times of day, create separate appointment suggestions to reflect those preferences.
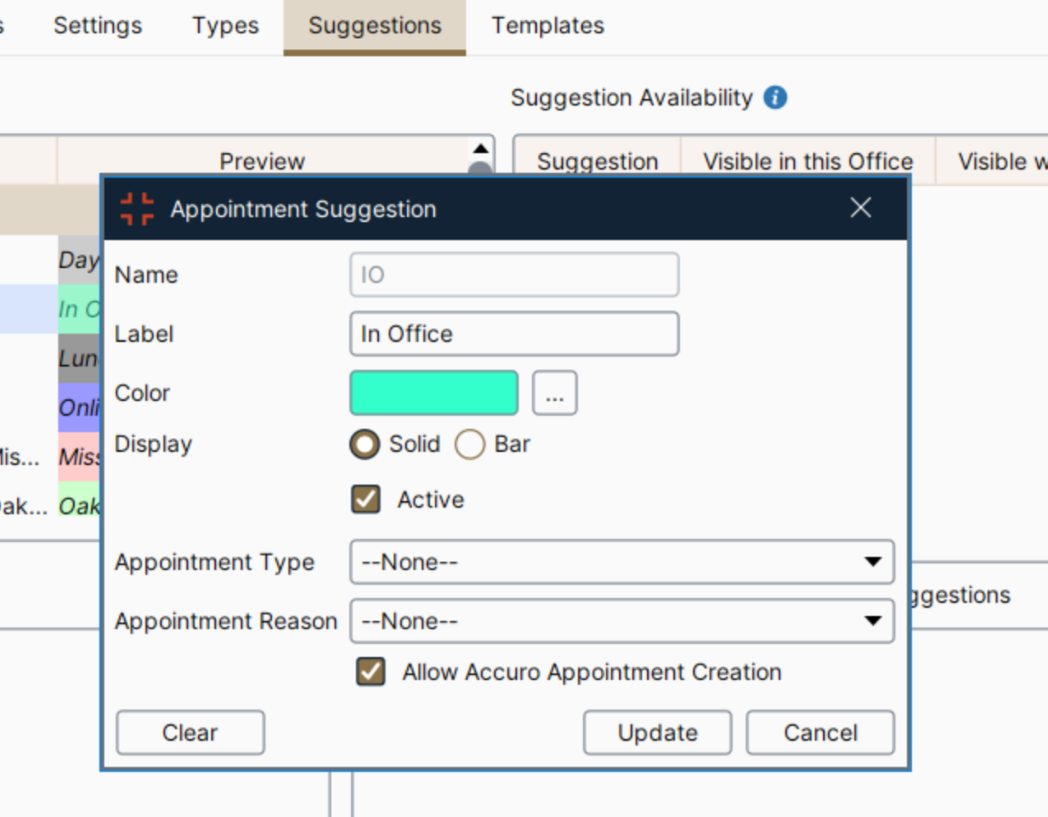
1.1 How to Create Appointment Suggestions
Navigate to the Menu (bottom-left corner of the Accuro screen).
Select Scheduler > Scheduler Management.
Click the Suggestions tab at the top.
Click the green + icon to add a new appointment suggestion.
Enter the required details (e.g. name and colour).
Click Save.
Repeat as needed for each appointment type.
Step 2: Create a Suggestion Template
After creating your appointment suggestions, you must build a template that places those suggestions into the provider’s schedule.
2.1 How to Create a Suggestion Template
Go to the Templates tab.
In the Manage Templates panel, click the green + icon.
Enter a name for the new schedule template.
Set the Interval to a duration that works with your appointment lengths (for example, choose an interval that divides evenly into your longest appointment type).

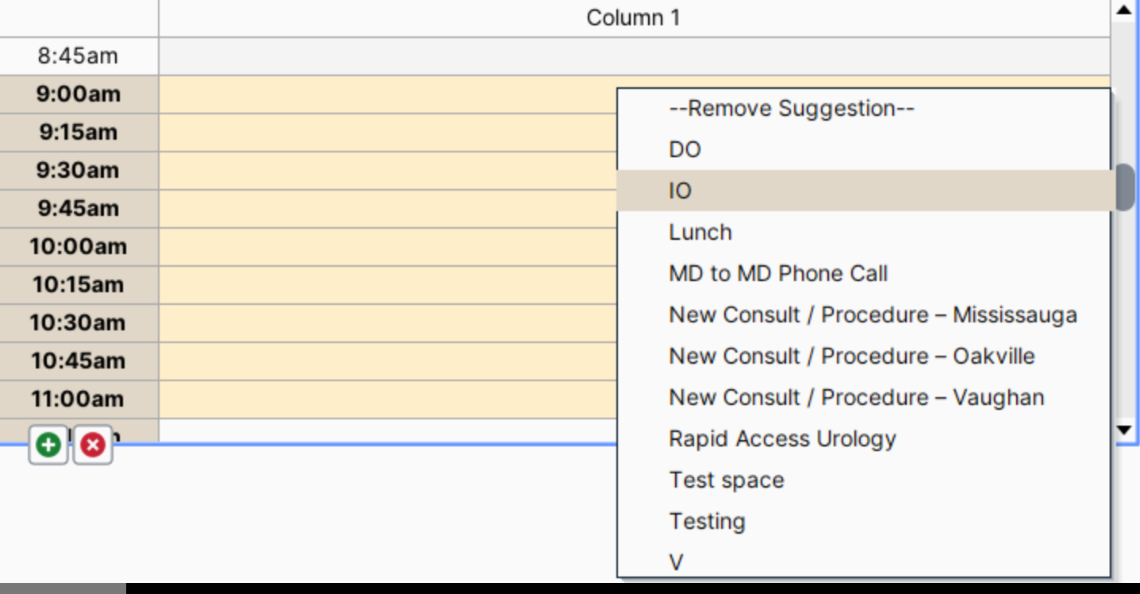
In the scheduling grid below:
Highlight the time blocks when the provider allows online bookings.
Right-click on the highlighted cells.
Select the appropriate Appointment Suggestion.
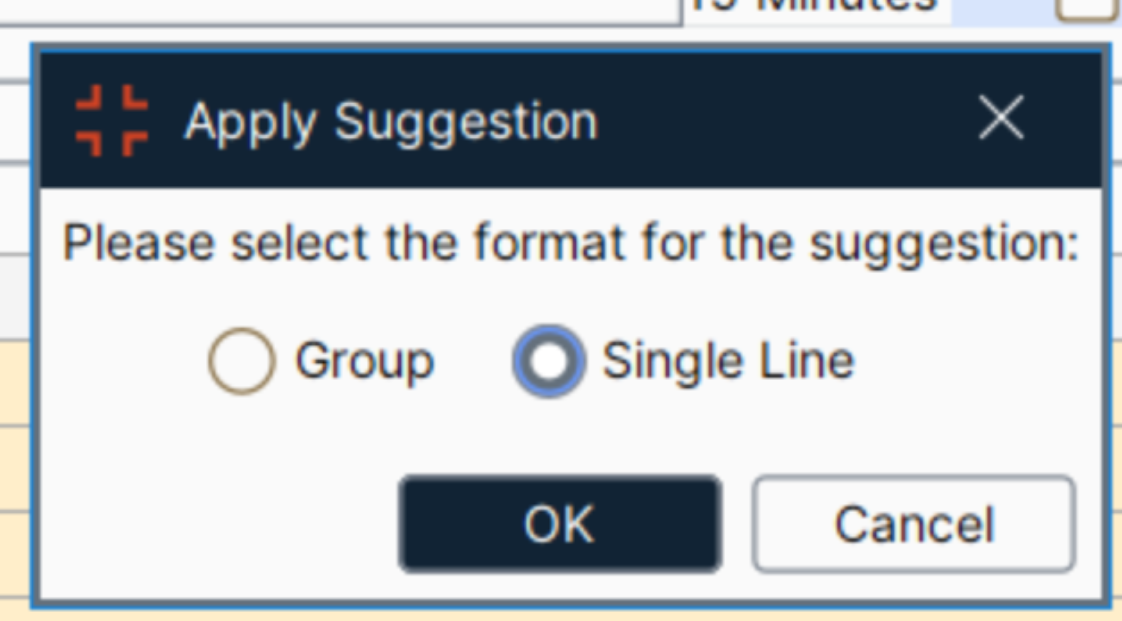
Choose Single Line as the format type.
Click Apply.
Save the template once completed.
Step 3: Apply the Suggestion Template to a Provider
Once the template is created, it must be applied to the provider’s schedule.
3.1 How to Apply the Template
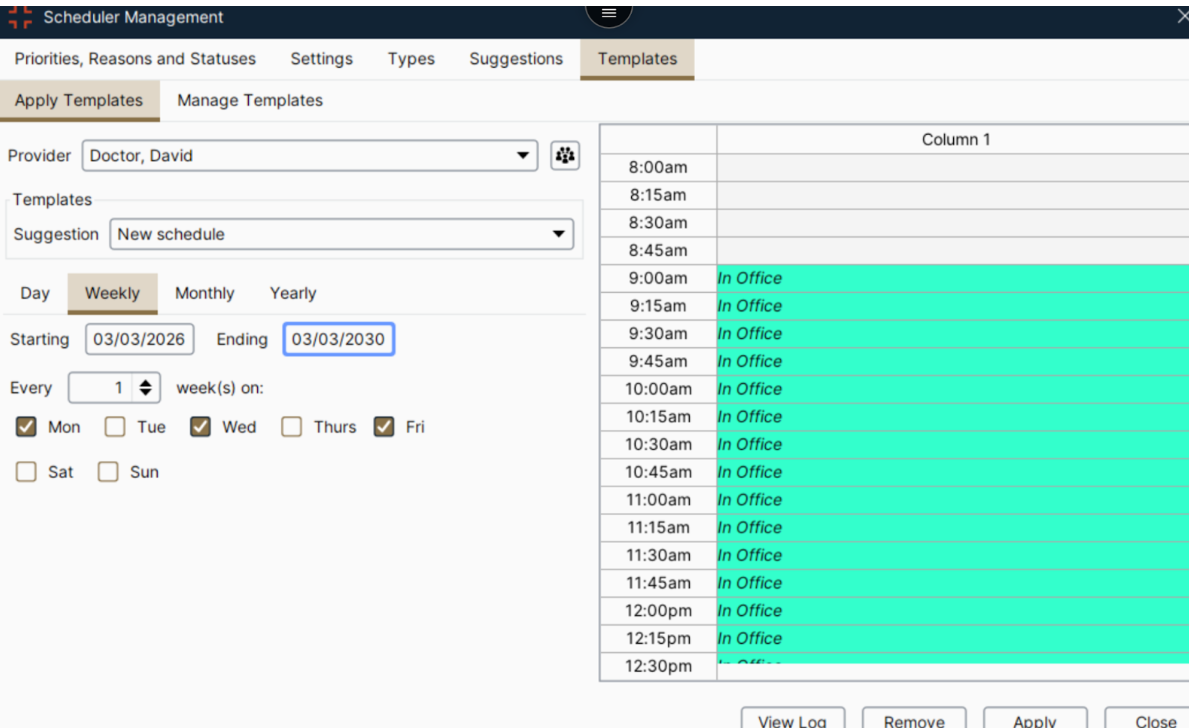
Go to the Apply Template panel.
Select the provider from the list.
Choose the appropriate Suggestion Template from the dropdown menu.
Select the days of the week the schedule should apply to.
Enter the start date and end date for the schedule.
Click Apply.
Final Check
Return to the provider’s schedule page to confirm that the new suggestion template has been successfully applied and that the appointment slots appear as expected.