Welcome to Cortico's Knowledge Base
Official Cortico Product information for customers and users.

Terminals
Customer iPad Setup Guide
iPad Setup for In-Clinic Terminal
Updated 2 weeks ago
Before beginning, you will need the following:
Your Cortico Clinic URL (ie, kmc.cortico.ca/patients). As well as the login information for the terminal
(username + password)
The following setup is the initial setup that prepares the iPad for use as a Cortico Terminal.
Go to the app store and install the free ‘Cortico Kiosk’ app.
2. Open the app once installed. You should see the Kiosk Setup screen. Enter the clinic URL ([clinicname].cortico.ca/patients), which should be provided to you by Cortico. After entering the URL, click "Set Clinic URL" to proceed. Now you should see an "Access Denied", prompting you to login. Enter the Terminal login information provided to you by Cortico (not your personal Cortico account).
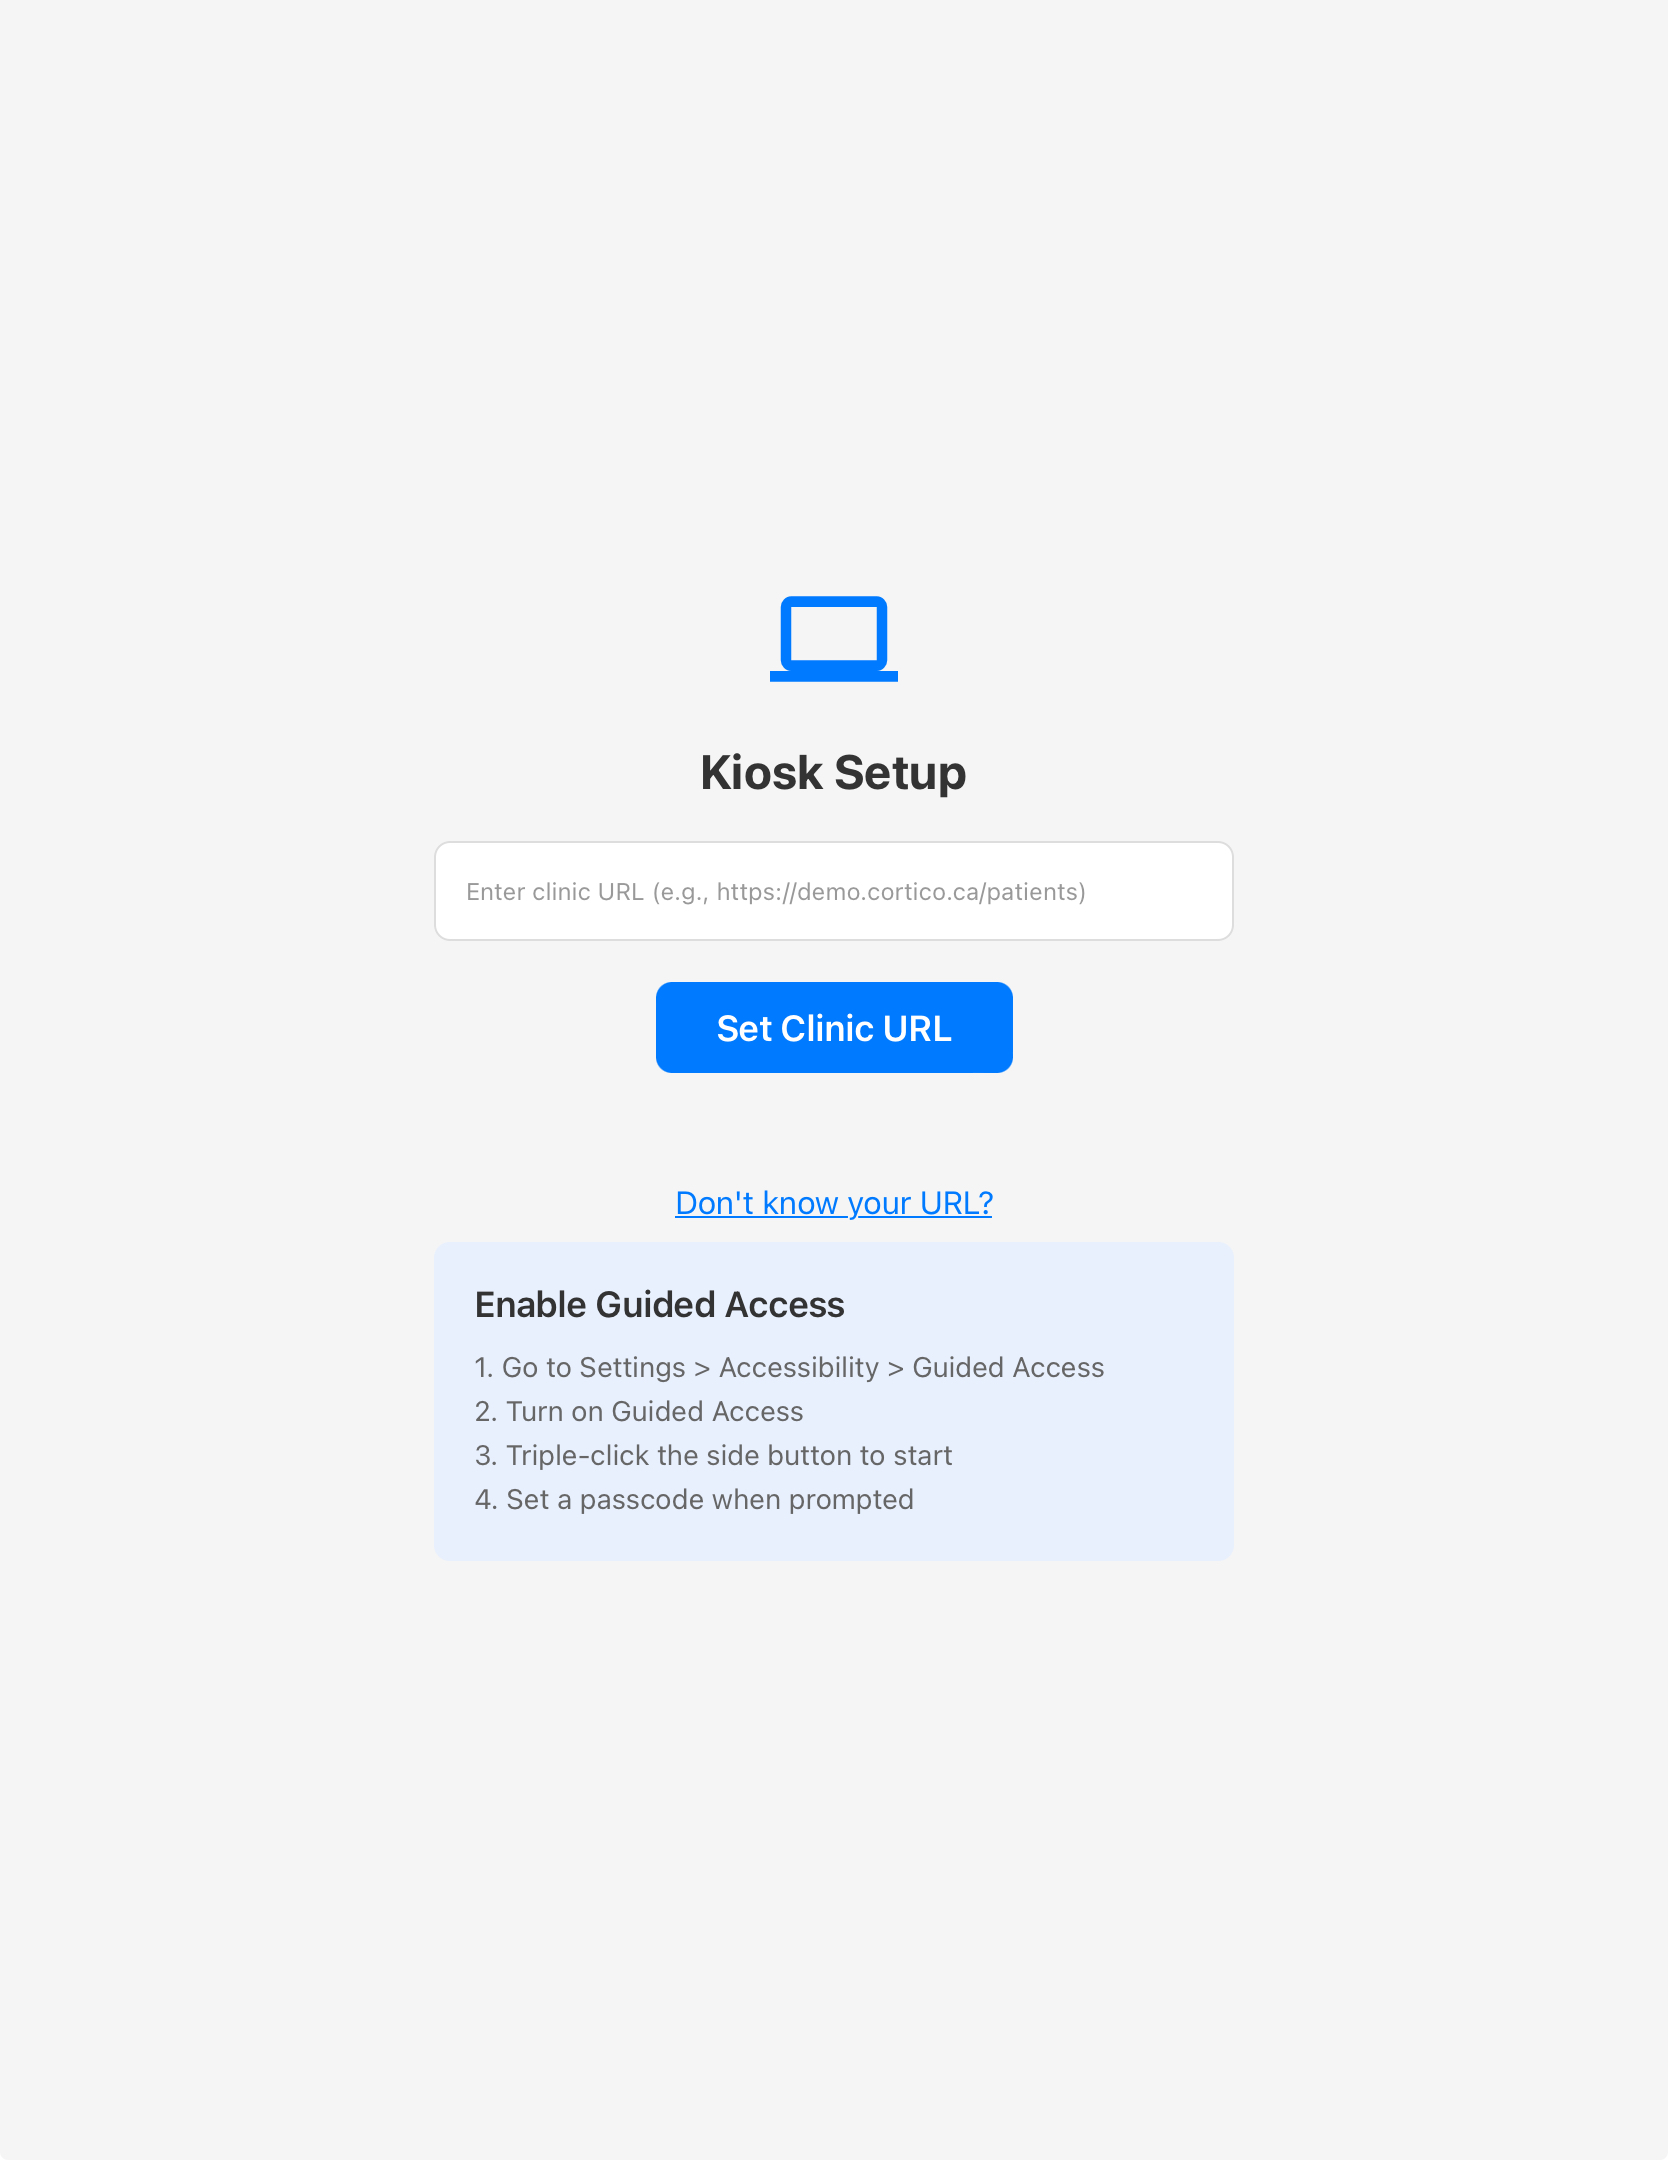
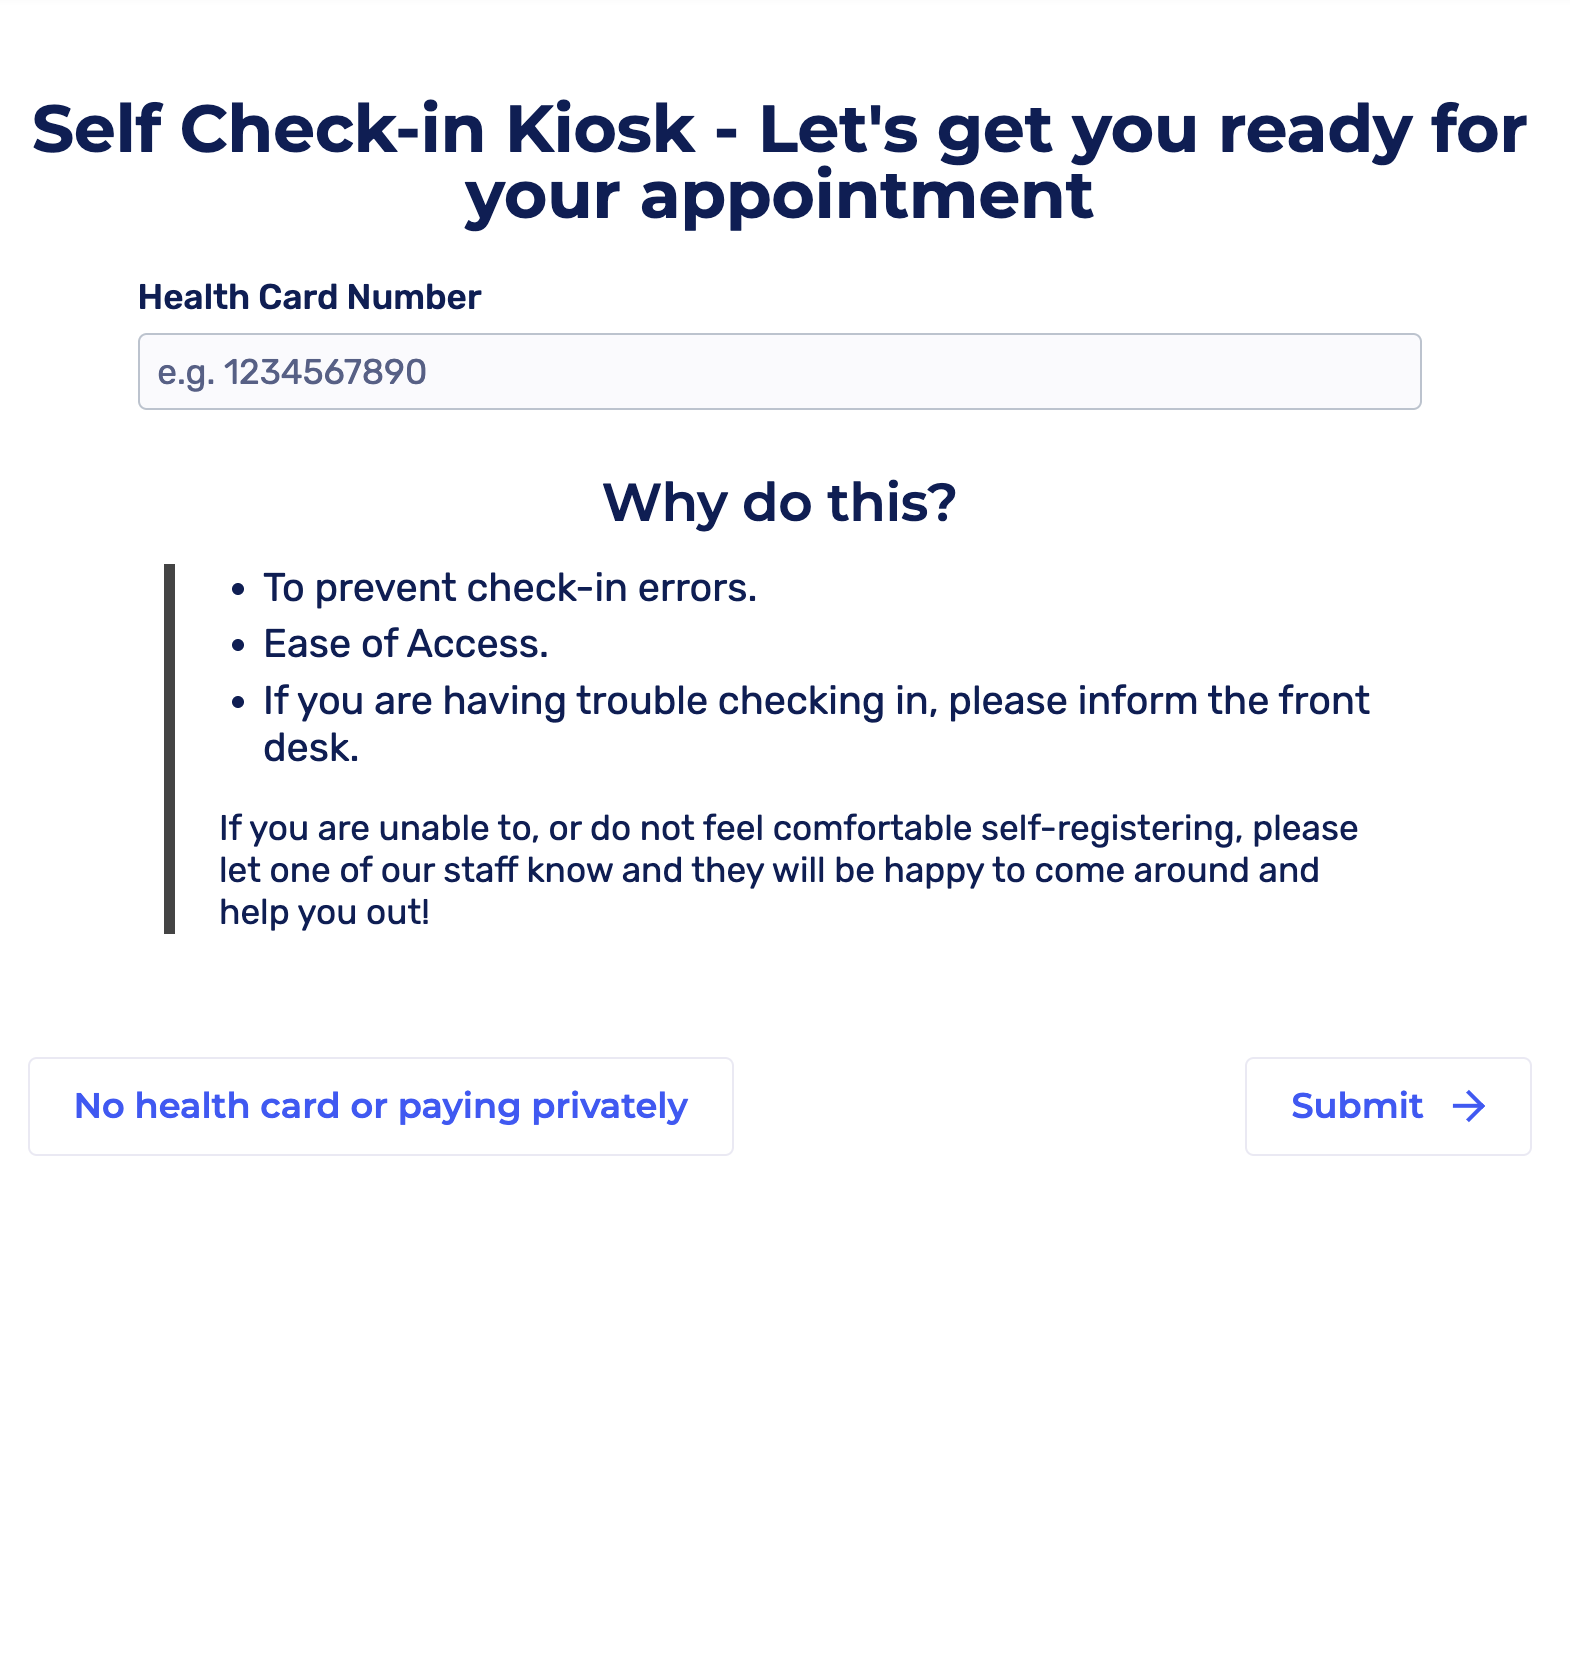
Now you should see a page like this:
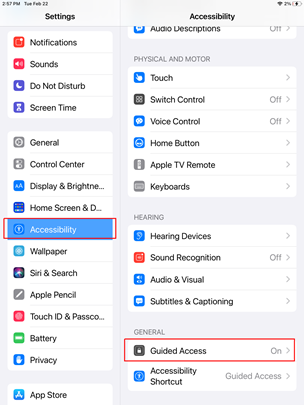
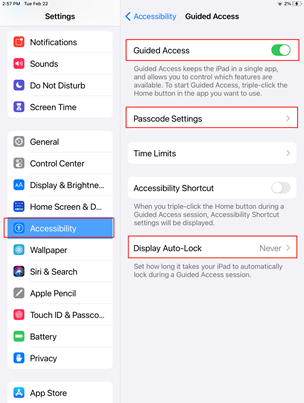
3. Next, is to turn on Guided Access. Guided Access prevents patients from accidentally navigating away from the kiosk app or launching another app on the iPad. To turn on, go to the Settings App -> Accessibility -> Guided Access, and enable this. Then set the passcode, and in the settings, change the ‘Display Auto-Lock’ to ‘Never’.
4. Test guided access mode by triple-clicking the home button, it should make it so you are
unable to exit the landing page
Your iPad should now be working! To end guided access, triple-click the home button, type in
the password and click End.
5. Now that Guided Access is enabled, open the Cortico Kiosk app and enable Guided Access by triple-clicking the home button. The kiosk terminal is now ready to be used by patients.